微信公众号 Markdown 转换神器上线

项目介绍
Markdown 转微信公众帐号内容神器,能自动即时渲染为微信公众号图文,不再为微信文章排版而发愁!只要你会基本的 Markdown 语法,就能做出一篇样式简洁而又美观大方的微信图文。
同时无需作任何调整就能一键复制到微信公众号使用,特别针对代码展示做了优化。
在线编辑器地址
为何二次开发
使用微信公众号编辑器有几个十分头疼的问题:
粘贴出来的代码,无法进行代码格式和主题的修改。
图片上传通过微信公众号平台进行上传,不方便获取到图片的地址,多平台发布不方便。
考虑到个人需求,一份 Markdown 文件同时发表到个人博客网站和公众号,所以统一使用本地编写 Markdown 文件,同时集成图床的功能,不关心样式和排版,把最重要的东西也就是内容写好。
体验了目前主流的各种开源微信 Markdown 编辑器,样式繁杂,不够简洁。在使用它们进行文章排版的时候,经常还要自己做一些改动,费时费力,因此动手做了二次开发。
注:该项目最新版本基于 Vue3 开发,基于 Vue2 的旧版本已经不再维护。代码 fork from:https://github.com/doocs/md。
本地调试
# 下载代码
git clone git@github.com:flyeric0212/weixin-md.git
cd weixin-md
# 安装依赖
npm i
# 启动本地开发模式,访问 http://localhost:5173/md/
npm run dev搭建私有服务
这里提供两种部署方式,一种部署到 GitHub Page,一种是部署到公用云服务器上。
使用 Github Page
大致的执行步骤如下:
在 Github 新建
flyeric0212.github.io仓库,其中flyeric0212为 github 的 username,需要替换成自己的。将最新代码 push 到该仓库中,参考
deploy.sh脚本。Github Actions会进行自动构建,只需等待即可。最后使用
https://flyeric0212.github.io进行访问。
deploy.sh 脚本:
#!/usr/bin/env sh
# abort on errors
set -e
# build
npm run build:h5-netlify
# navigate into the build output directory
cd dist
# push build code to gh-pages
git init
git add -A
current_time=$(date +"%Y-%m-%d %H:%M:%S")
git commit -m "deploy on $current_time"
git push -f git@github.com:flyeric0212/flyeric0212.github.io.git main
cd -注:将代码仓库地址替换成自己的,并且本地电脑有 SSH 权限。
如果脚本没有权限的话,需要设置执行权限:
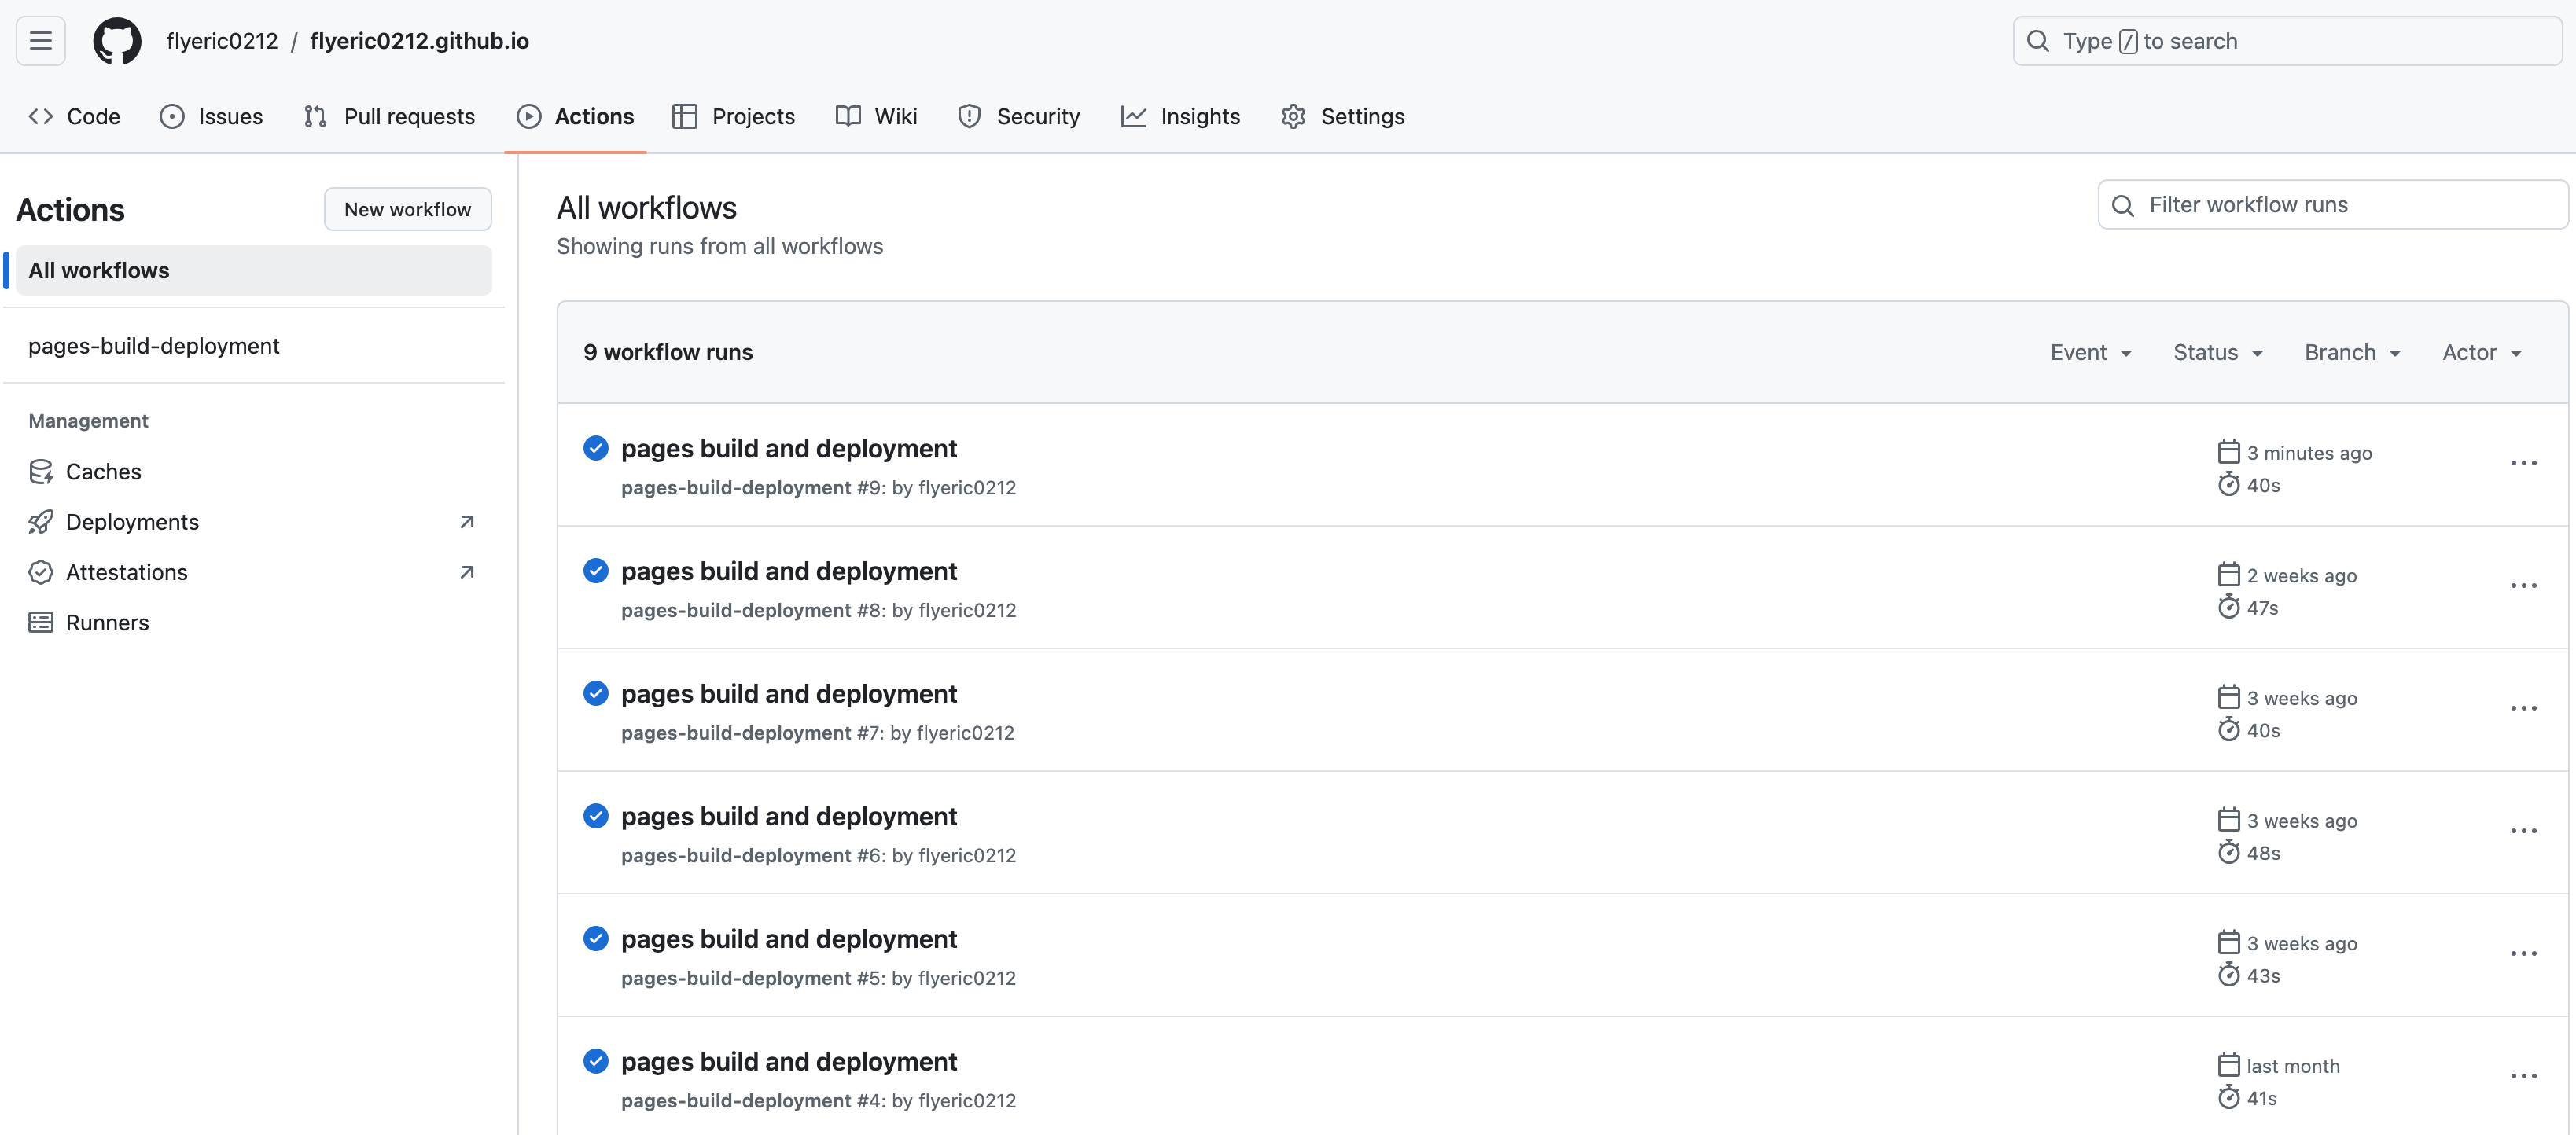
chmod +x deploy.shGithub Actions 构建记录:

使用公有云服务器
💡如果你没有科学上网的话,国内访问 Github Page 很慢,而且有时候无法加载出来,所以本人将该项目部署到公有云服务器中。
大致步骤如下:
准备
nginx.conf和Dockerfile等配置文件构建 Docker 镜像,并上传到个人镜像仓库(因最近 Docker 禁封等问题,可以参考:国内无法拉取 Docker 镜像解决方案)
准备云服务器和域名(备选,如果没有的话,直接使用公有ip 访问,同时还需要域名进行备案)
部署到公有云
01 镜像构建准备
nginx.conf:
server {
set $loggable 1;
if ($http_user_agent ~* kube-probe) {
set $loggable 0;
}
access_log /var/log/nginx/access.log combined if=$loggable;
error_log /var/log/nginx/error.log error;
gzip on;
gzip_proxied any;
gzip_comp_level 6;
gzip_min_length 1k;
gzip_buffers 16 8k;
gzip_http_version 1.1;
gzip_types text/css application/javascript application/json application/font-woff application/font-tff image/gif image/png image/svg+xml application/octet-stream;
gzip_vary on;
listen 80;
server_name localhost;
location / {
root /usr/share/nginx/html;
index index.html index.htm;
try_files $uri /index.html =404;
}
error_page 500 502 503 504 /50x.html;
location = /50x.html {
root /usr/share/nginx/html;
}
}Dockerfile:
FROM registry.cn-chengdu.aliyuncs.com/flyeric/nginx:latest
COPY dist /usr/share/nginx/html
COPY nginx.conf /etc/nginx/conf.d/default.conf
CMD /bin/bash -c "exec nginx -g 'daemon off;'"02 构建 Docker 镜像
构建 Docker 镜像步骤。
# 登录阿里云Docker Registry
docker login --username=amuguelove1991 registry.cn-chengdu.aliyuncs.com
# 构建镜像
docker build -t amuguelove/weixin-md:1.0.0 .
docker tag amuguelove/weixin-md:1.0.0 registry.cn-chengdu.aliyuncs.com/flyeric/weixin-md:1.0.0
# 推送到阿里云Docker Registry
docker push registry.cn-chengdu.aliyuncs.com/flyeric/weixin-md:1.0.01)本地运行,并通过http://localhost:8091 进行访问验证:
docker run -it -d --name weixin-md -p 8091:80 registry.cn-chengdu.aliyuncs.com/flyeric/weixin-md:1.0.003 准备云服务器和域名
这里不做详细介绍,自行按需购买,考虑到成本选购腾讯云轻量级云服务器。
04 部署到公有云服务器
以下是采用腾讯云轻量级云服务器进行部署,自带了很多自有的软件,比如:Docker、Nginx 等。
1)通过 Docker 进行部署

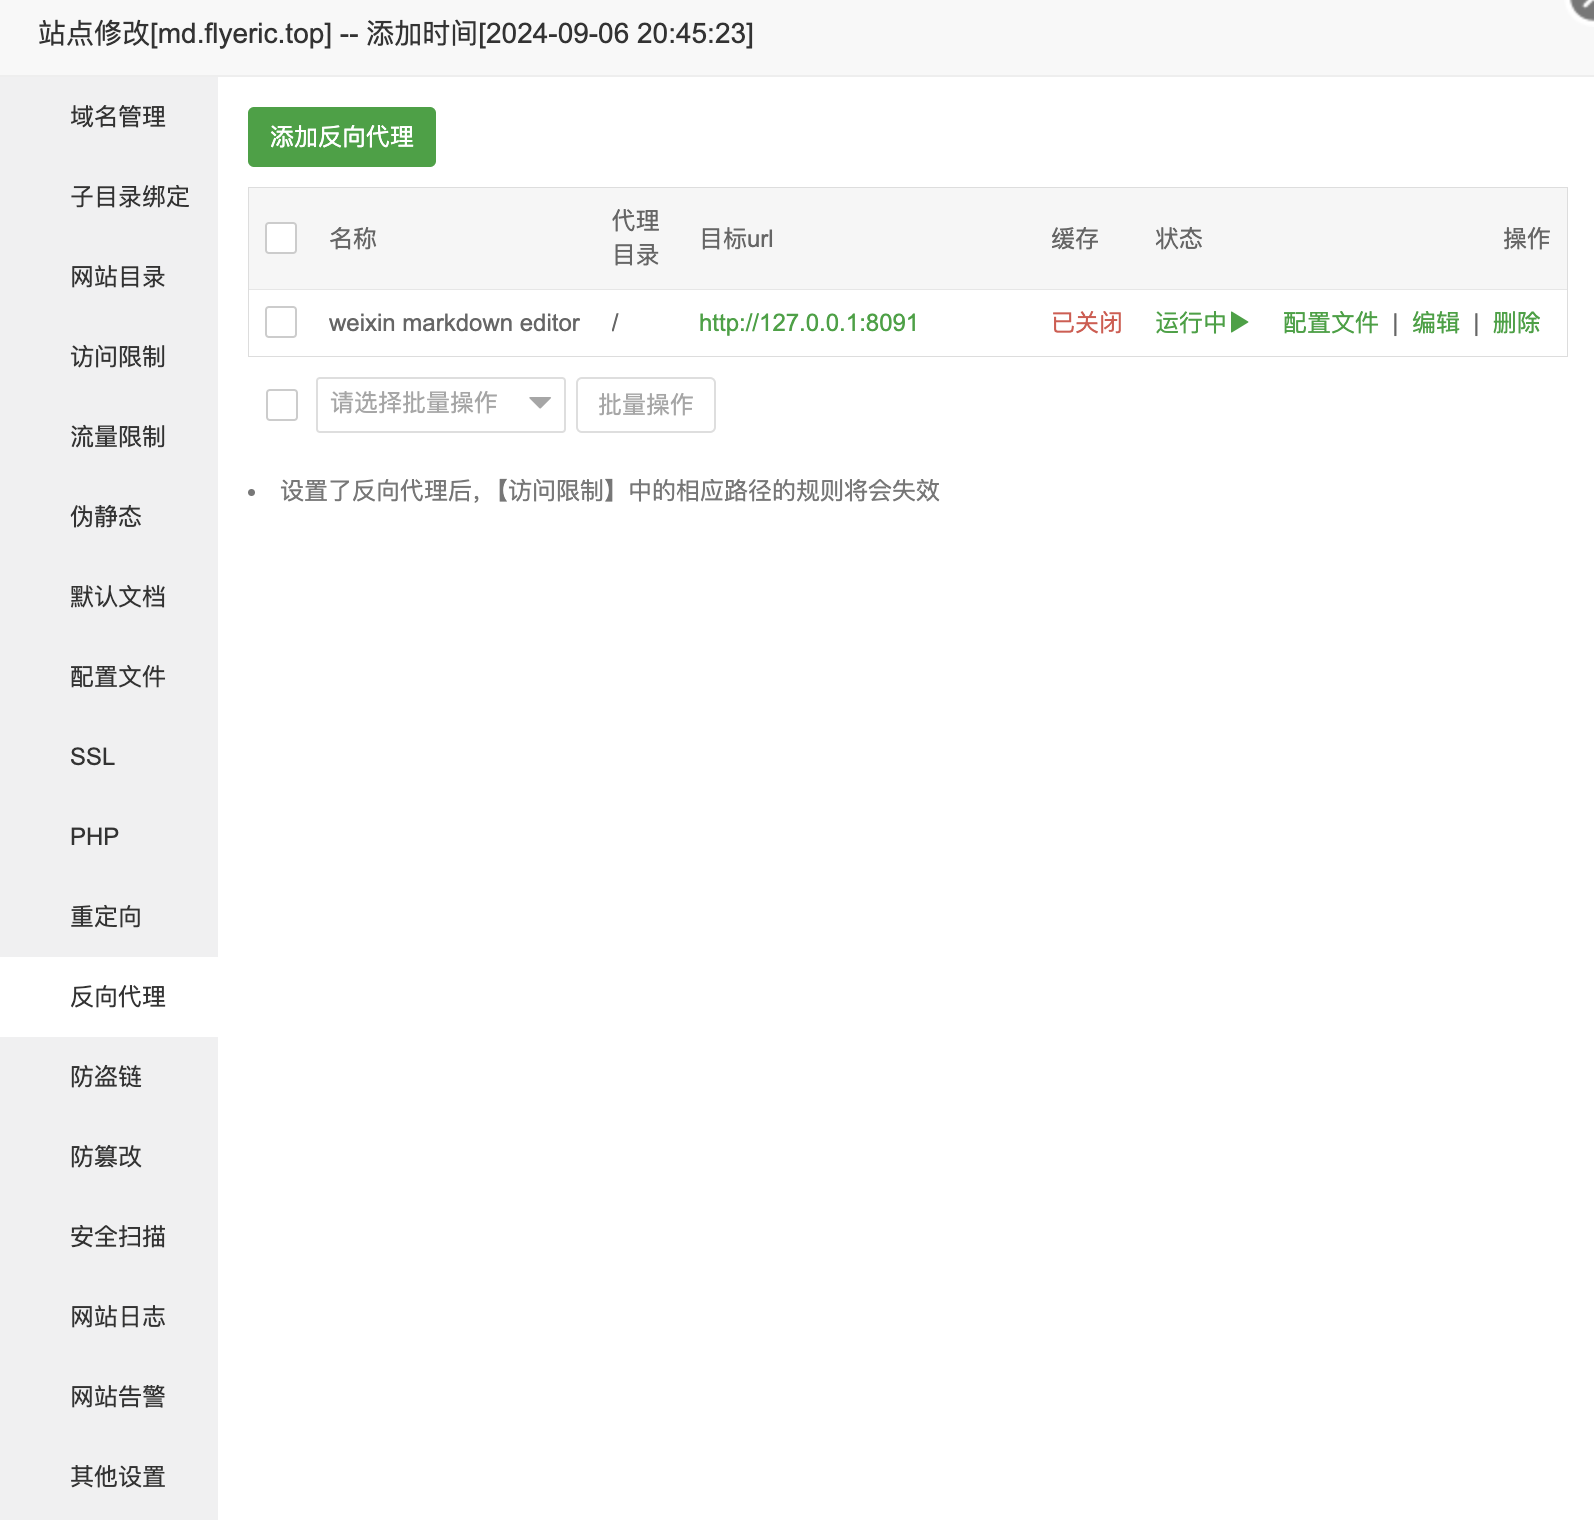
2)子域名配置反向代理

具体配置如下:
server {
listen 80;
listen 443 ssl http2;
server_name md.flyeric.top;
index index.php index.html index.htm default.php default.htm default.html;
root /www/wwwroot/md.flyeric.top;
#CERT-APPLY-CHECK--START
# 用于SSL证书申请时的文件验证相关配置 -- 请勿删除
include /www/server/panel/vhost/nginx/well-known/md.flyeric.top.conf;
#CERT-APPLY-CHECK--END
#SSL-START SSL相关配置,请勿删除或修改下一行带注释的404规则
#error_page 404/404.html;
ssl_certificate /www/server/panel/vhost/cert/md.flyeric.top/fullchain.pem;
ssl_certificate_key /www/server/panel/vhost/cert/md.flyeric.top/privkey.pem;
ssl_protocols TLSv1.1 TLSv1.2 TLSv1.3;
ssl_ciphers EECDH+CHACHA20:EECDH+CHACHA20-draft:EECDH+AES128:RSA+AES128:EECDH+AES256:RSA+AES256:EECDH+3DES:RSA+3DES:!MD5;
ssl_prefer_server_ciphers on;
ssl_session_cache shared:SSL:10m;
ssl_session_timeout 10m;
add_header Strict-Transport-Security "max-age=31536000";
error_page 497 https://$host$request_uri;
#SSL-END
#ERROR-PAGE-START 错误页配置,可以注释、删除或修改
#error_page 404 /404.html;
#error_page 502 /502.html;
#ERROR-PAGE-END
#PHP-INFO-START PHP引用配置,可以注释或修改
#清理缓存规则
location ~ /purge(/.*) {
proxy_cache_purge cache_one $host$1$is_args$args;
#access_log /www/wwwlogs/md.flyeric.top_purge_cache.log;
}
#引用反向代理规则,注释后配置的反向代理将无效
include /www/server/panel/vhost/nginx/proxy/md.flyeric.top/*.conf;
include enable-php-00.conf;
#PHP-INFO-END
#REWRITE-START URL重写规则引用,修改后将导致面板设置的伪静态规则失效
include /www/server/panel/vhost/rewrite/md.flyeric.top.conf;
#REWRITE-END
#禁止访问的文件或目录
location ~ ^/(\.user.ini|\.htaccess|\.git|\.env|\.svn|\.project|LICENSE|README.md)
{
return 404;
}
#一键申请SSL证书验证目录相关设置
location ~ \.well-known{
allow all;
}
#禁止在证书验证目录放入敏感文件
if ( $uri ~ "^/\.well-known/.*\.(php|jsp|py|js|css|lua|ts|go|zip|tar\.gz|rar|7z|sql|bak)$" ) {
return 403;
}
access_log /www/wwwlogs/md.flyeric.top.log;
error_log /www/wwwlogs/md.flyeric.top.error.log;
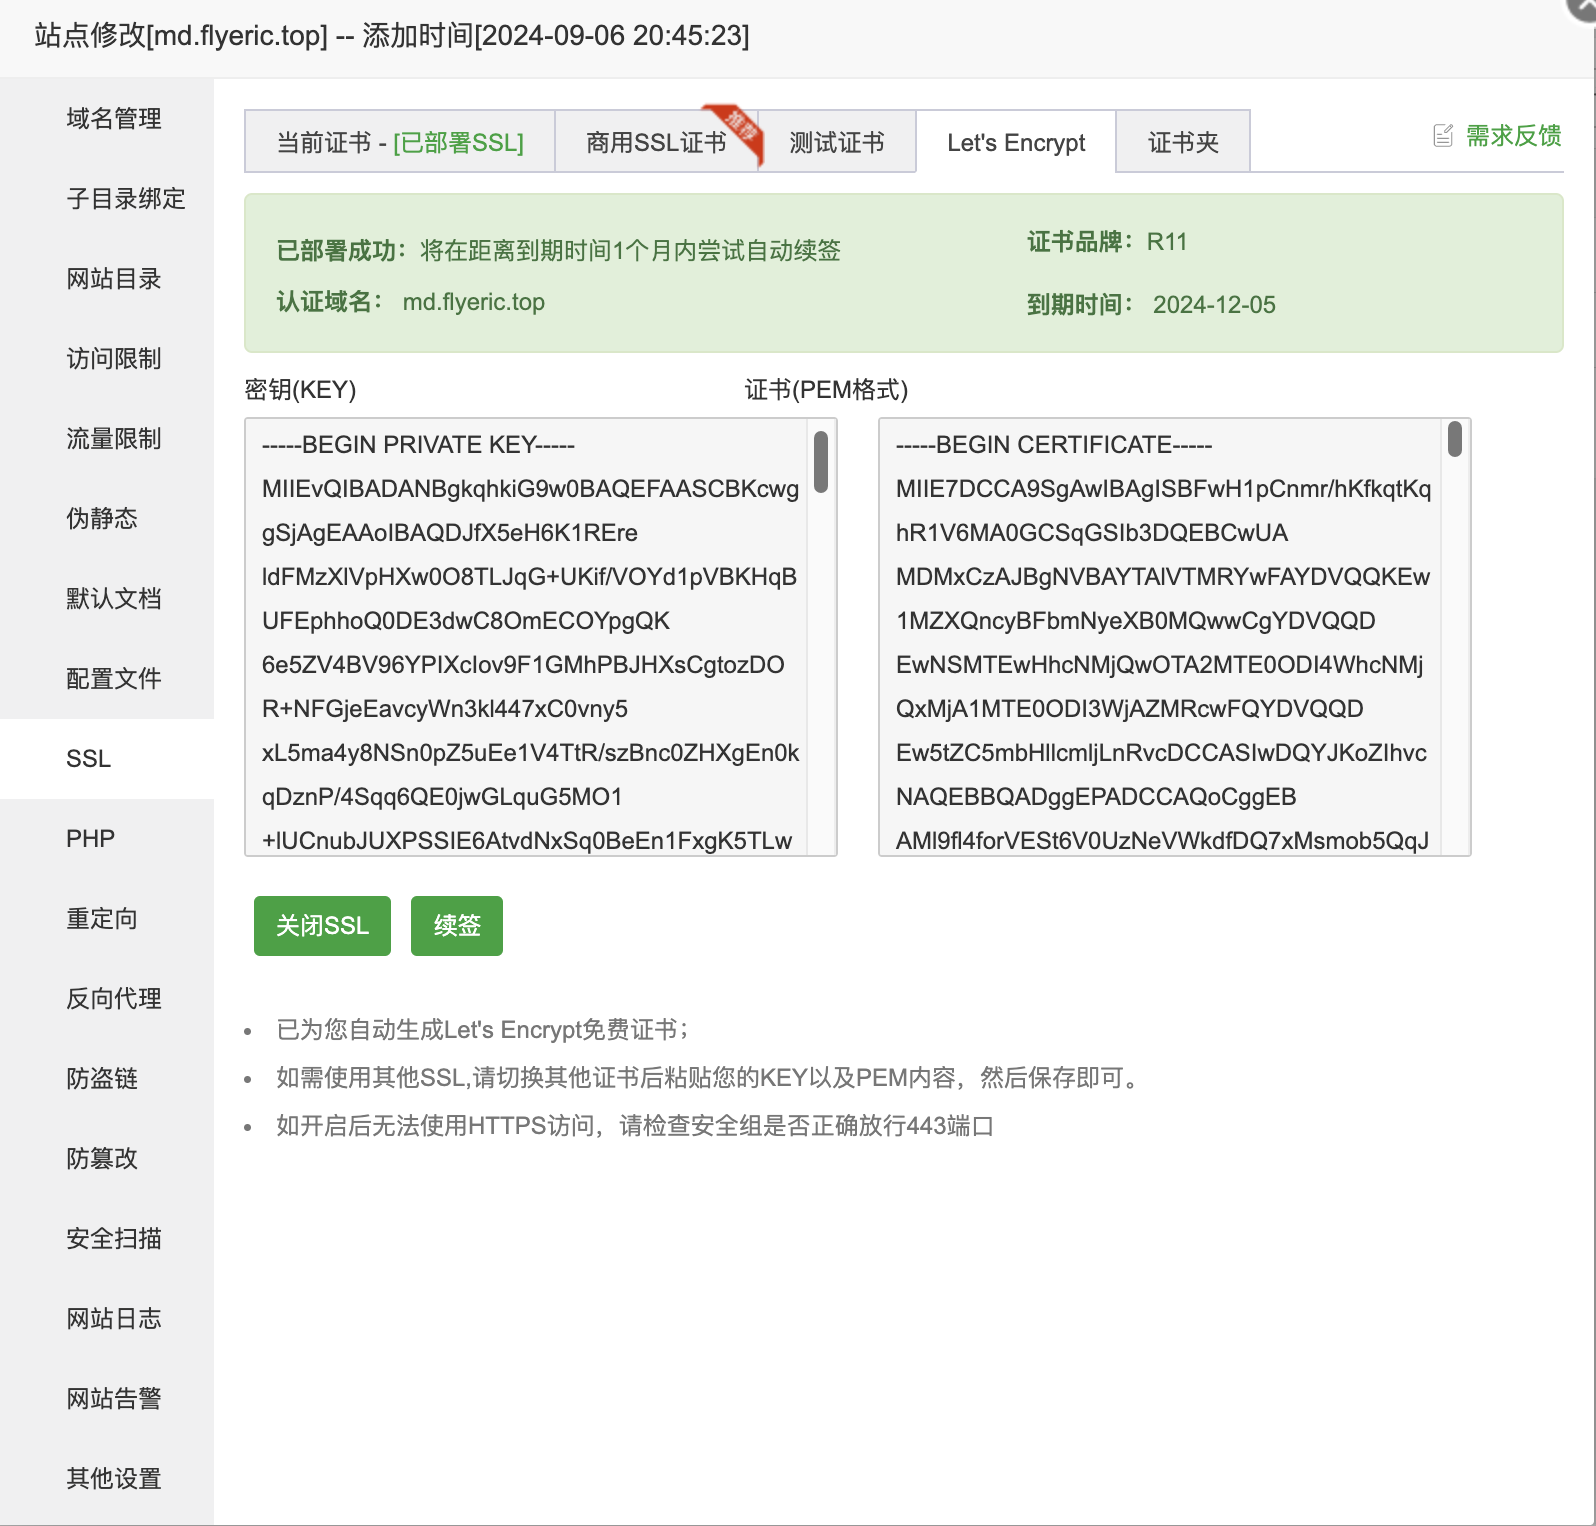
}3)自动 SSL 配置,并且能够到期提醒和续签

4)域名解析配置
新增一个主机记录为 md,记录类型为 A,记录值为你的公网 IP,等待DNS 生效即可。

到这里就可以通过子域名进行访问了。