微服务鉴权源码解析:SpringBoot 3.x + OAuth2
见字如面,与大家分享实践中的经验与思考。
之前写了一篇关于微服务权限架构设计的文章:微服务鉴权设计:SpringBoot 3.x + OAuth2,有很多小伙伴询问源码,这次专门写一篇文章进行简单讲解,源码地址会贴在文章的最后。
技术选型
- JDK 21
- Gradle 8.10.1
- SpringBoot 3.3.3
- SpringCloud 2023.0.3
- SpringCloud Gateway 4.1.5
- Spring Security 6.3.3、Oauth2 Authorization Server 1.3.2
- H2 Database 、Mybatis 3.0.3、Spring Jdbc、Flyway
本地环境快速切换 JDK、Gradle 版本,可以参考之前的文章:打造高效MacOS系统环境。
核心功能介绍
使用 JDK 21 + SpringBoot 3.3.3 搭建的一个微服务权限框架,主要包括如下功能:
api-gateway 作为网关,auth-service 作为统一认证服务器,order-service 作为业务服务。
api-gateway 统一代理访问 auth-service 和 order-service,并集成
oauth2-resource-server统一验证 jwt token 的合法性。auth-service 通过 h2 database + mybatis + flyway 管理数据库,这里是为了方便测试使用h2 database,可以自由切换到 mysql 等其他数据库,数据脚本和数据初始化,都放到了 db migration 文件夹中。
auth-service 中的 h2 数据库将数据存储在本地文件中,可以随时启动数据不会丢失。
auth-service 中的 JWT RSA 私钥和公钥已经提前生成好,这样每次 auth-service shutdown 后重启,token 也能识别有效。
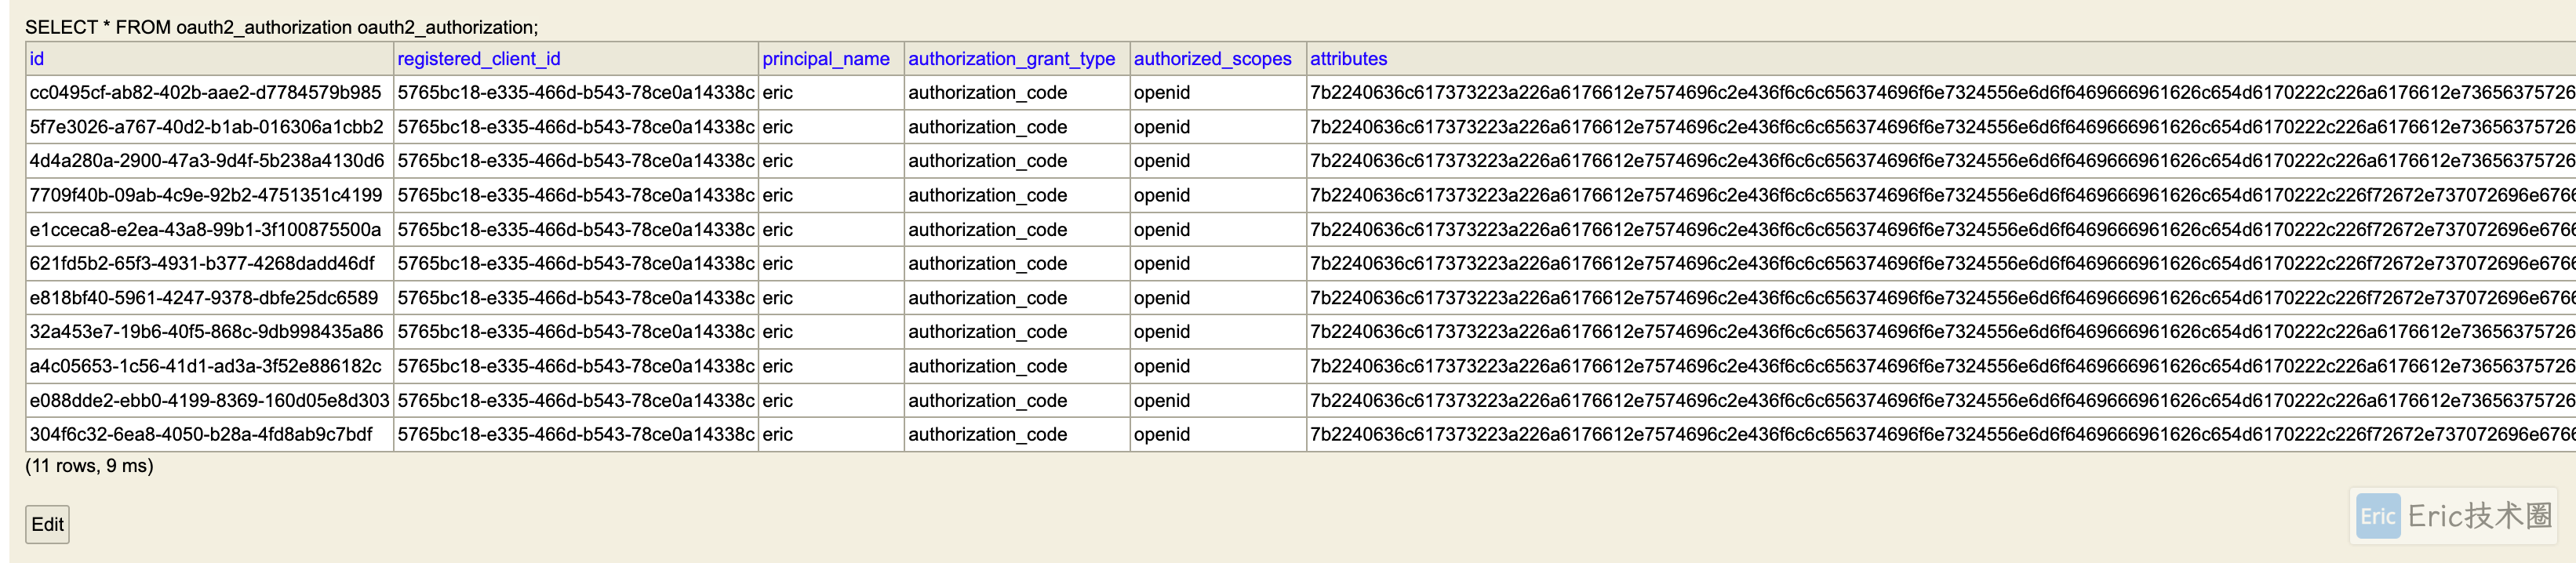
Oauth2 的所有信息都是基于数据库进行存储,而不是内存,但是这里使用的是官方默认的 jdbc repository。
order-service 作为不同的业务服务,不需要集成任何 oauth2 组件,由 api-gateway 代理,并通过 header 中添加 token 访问其接口资源。
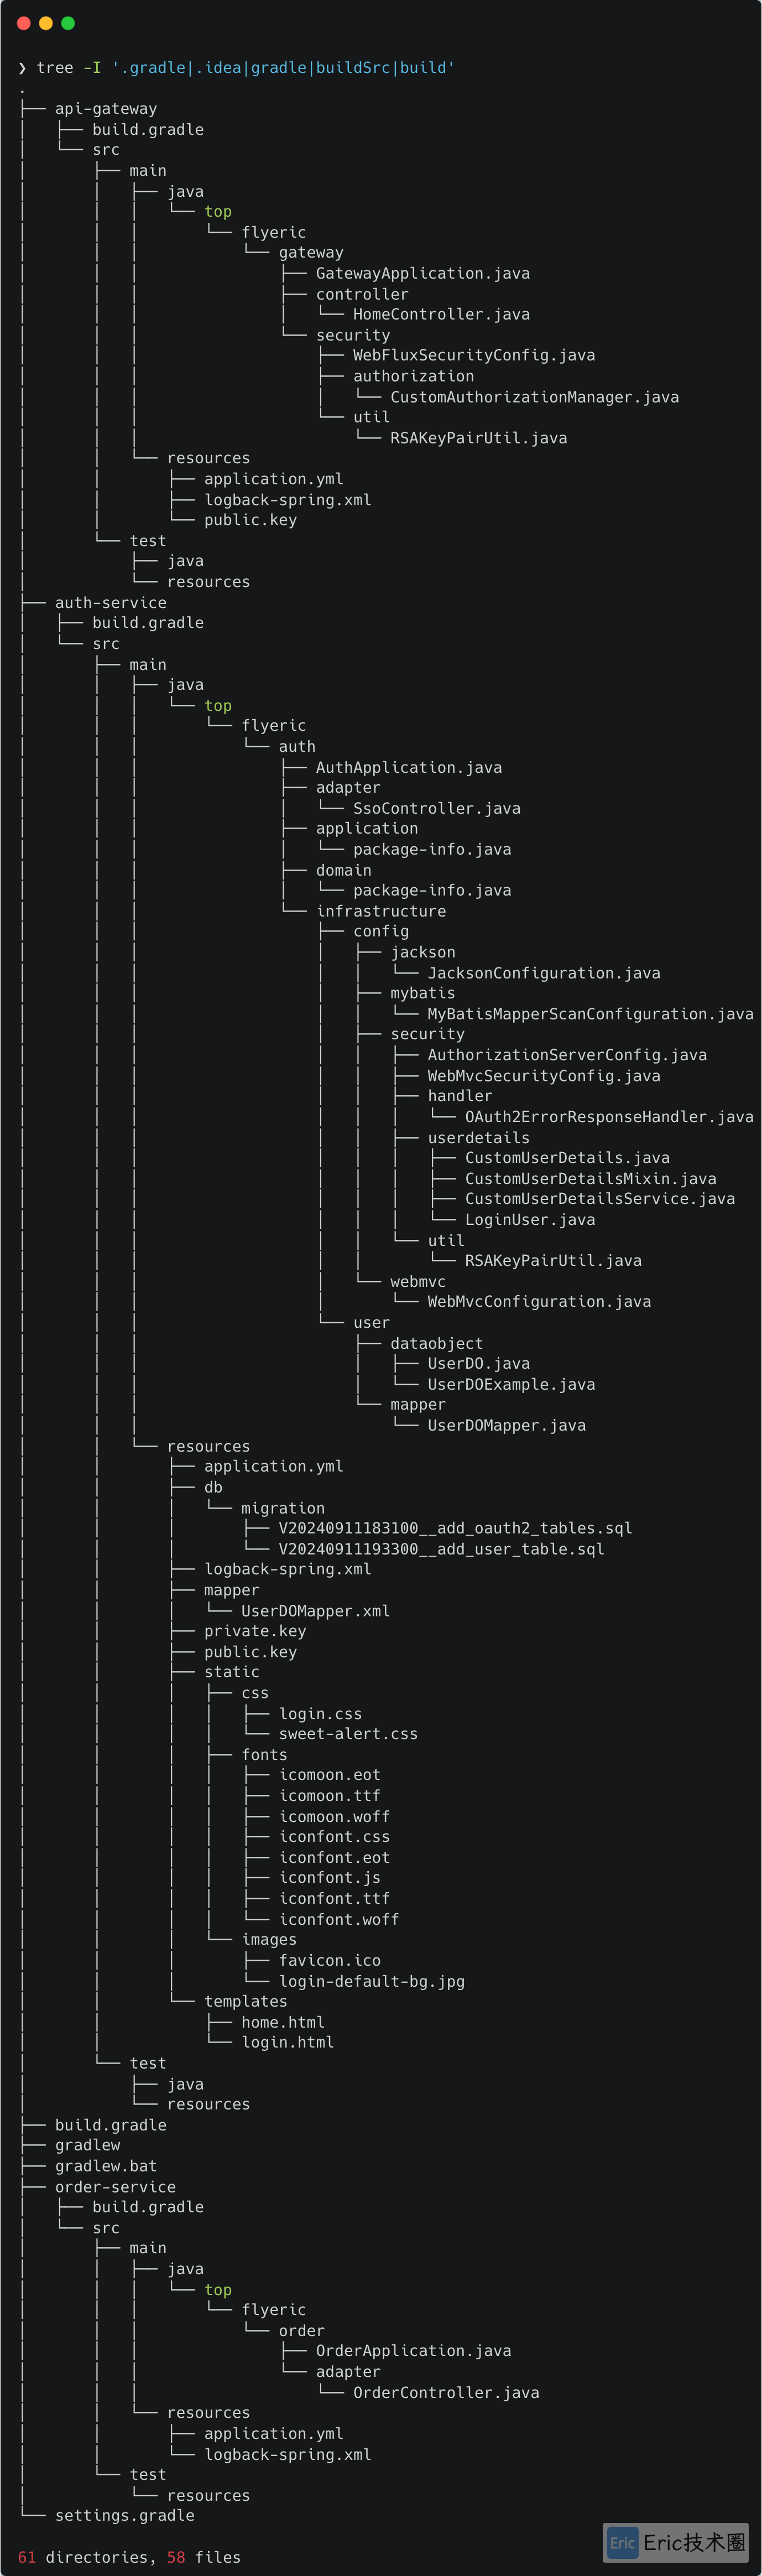
代码结构
树状结构图:
操作步骤
01 启动服务
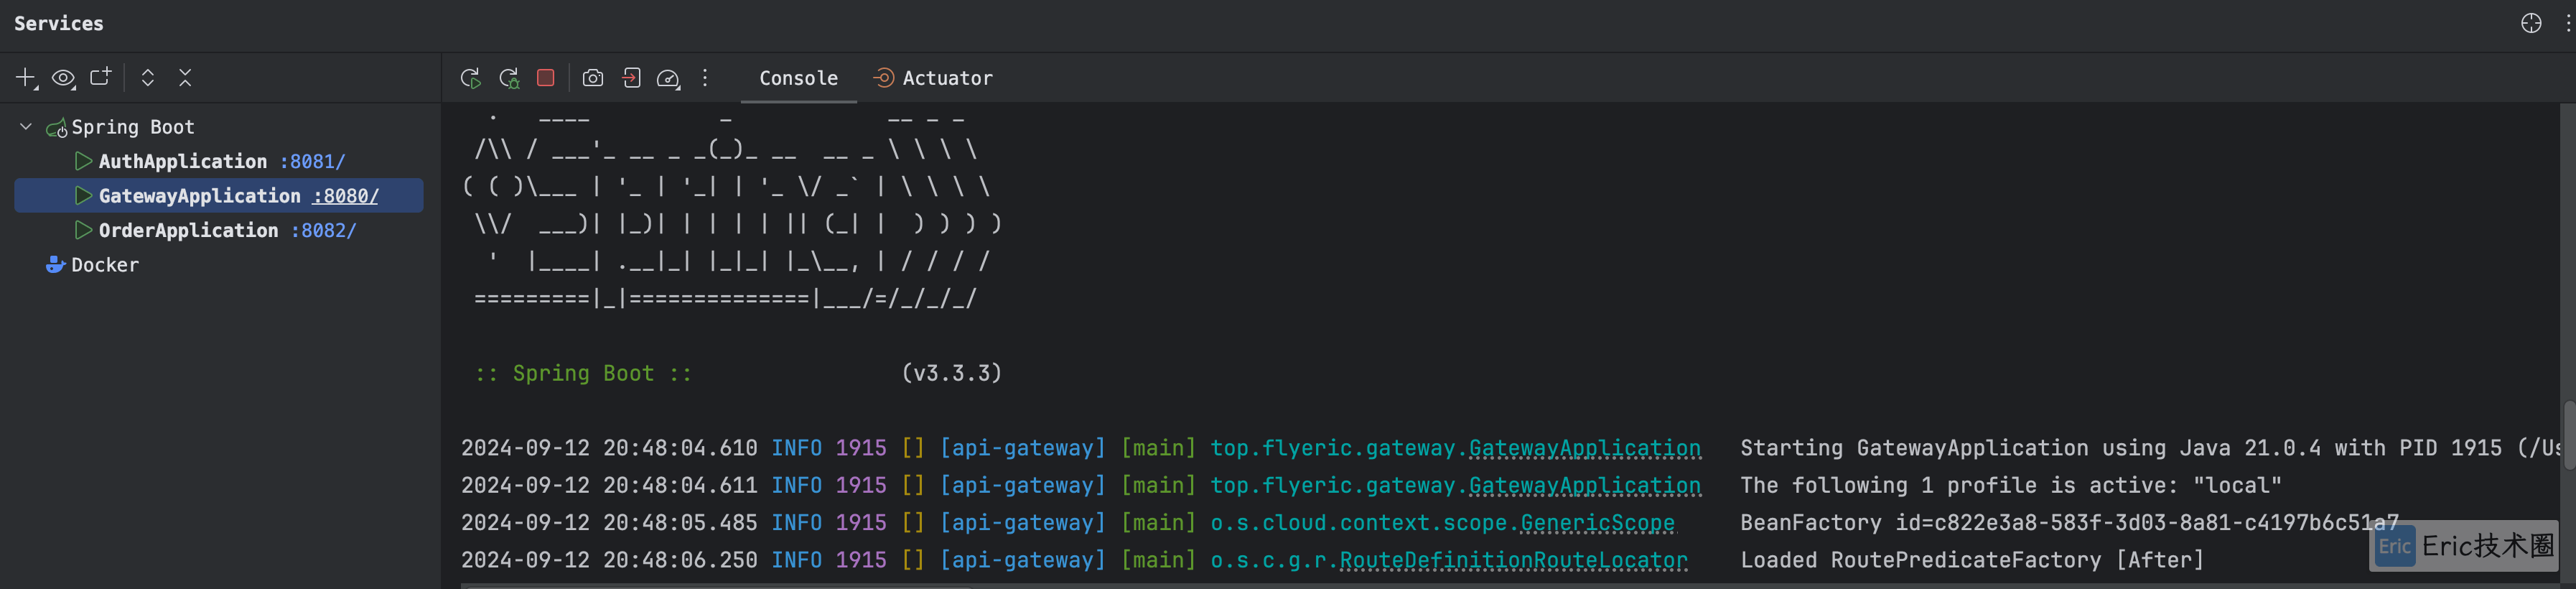
- api-gateway 端口:8080
- auth-service 端口:8081
- order-service 端口:8082
其中网关路由的部分配置如下:
spring:
cloud:
gateway:
discovery:
locator:
enabled: true
lower-case-service-id: true
url-expression: "'lb://'+serviceId"
routes:
- id: auth-service-route
uri: ${AUTH_SERVICE_URL:http://localhost:8081}
predicates:
- Path=/api/auth-service/**
filters:
- StripPrefix=2
- id: order-service-route
uri: ${ORDER_SERVICE_URL:http://localhost:8082}
predicates:
- Path=/api/order-service/**
filters:
- StripPrefix=202 查看授权服务器信息
通过地址:http://localhost:8081/.well-known/openid-configuration 查看具体的服务器信息。
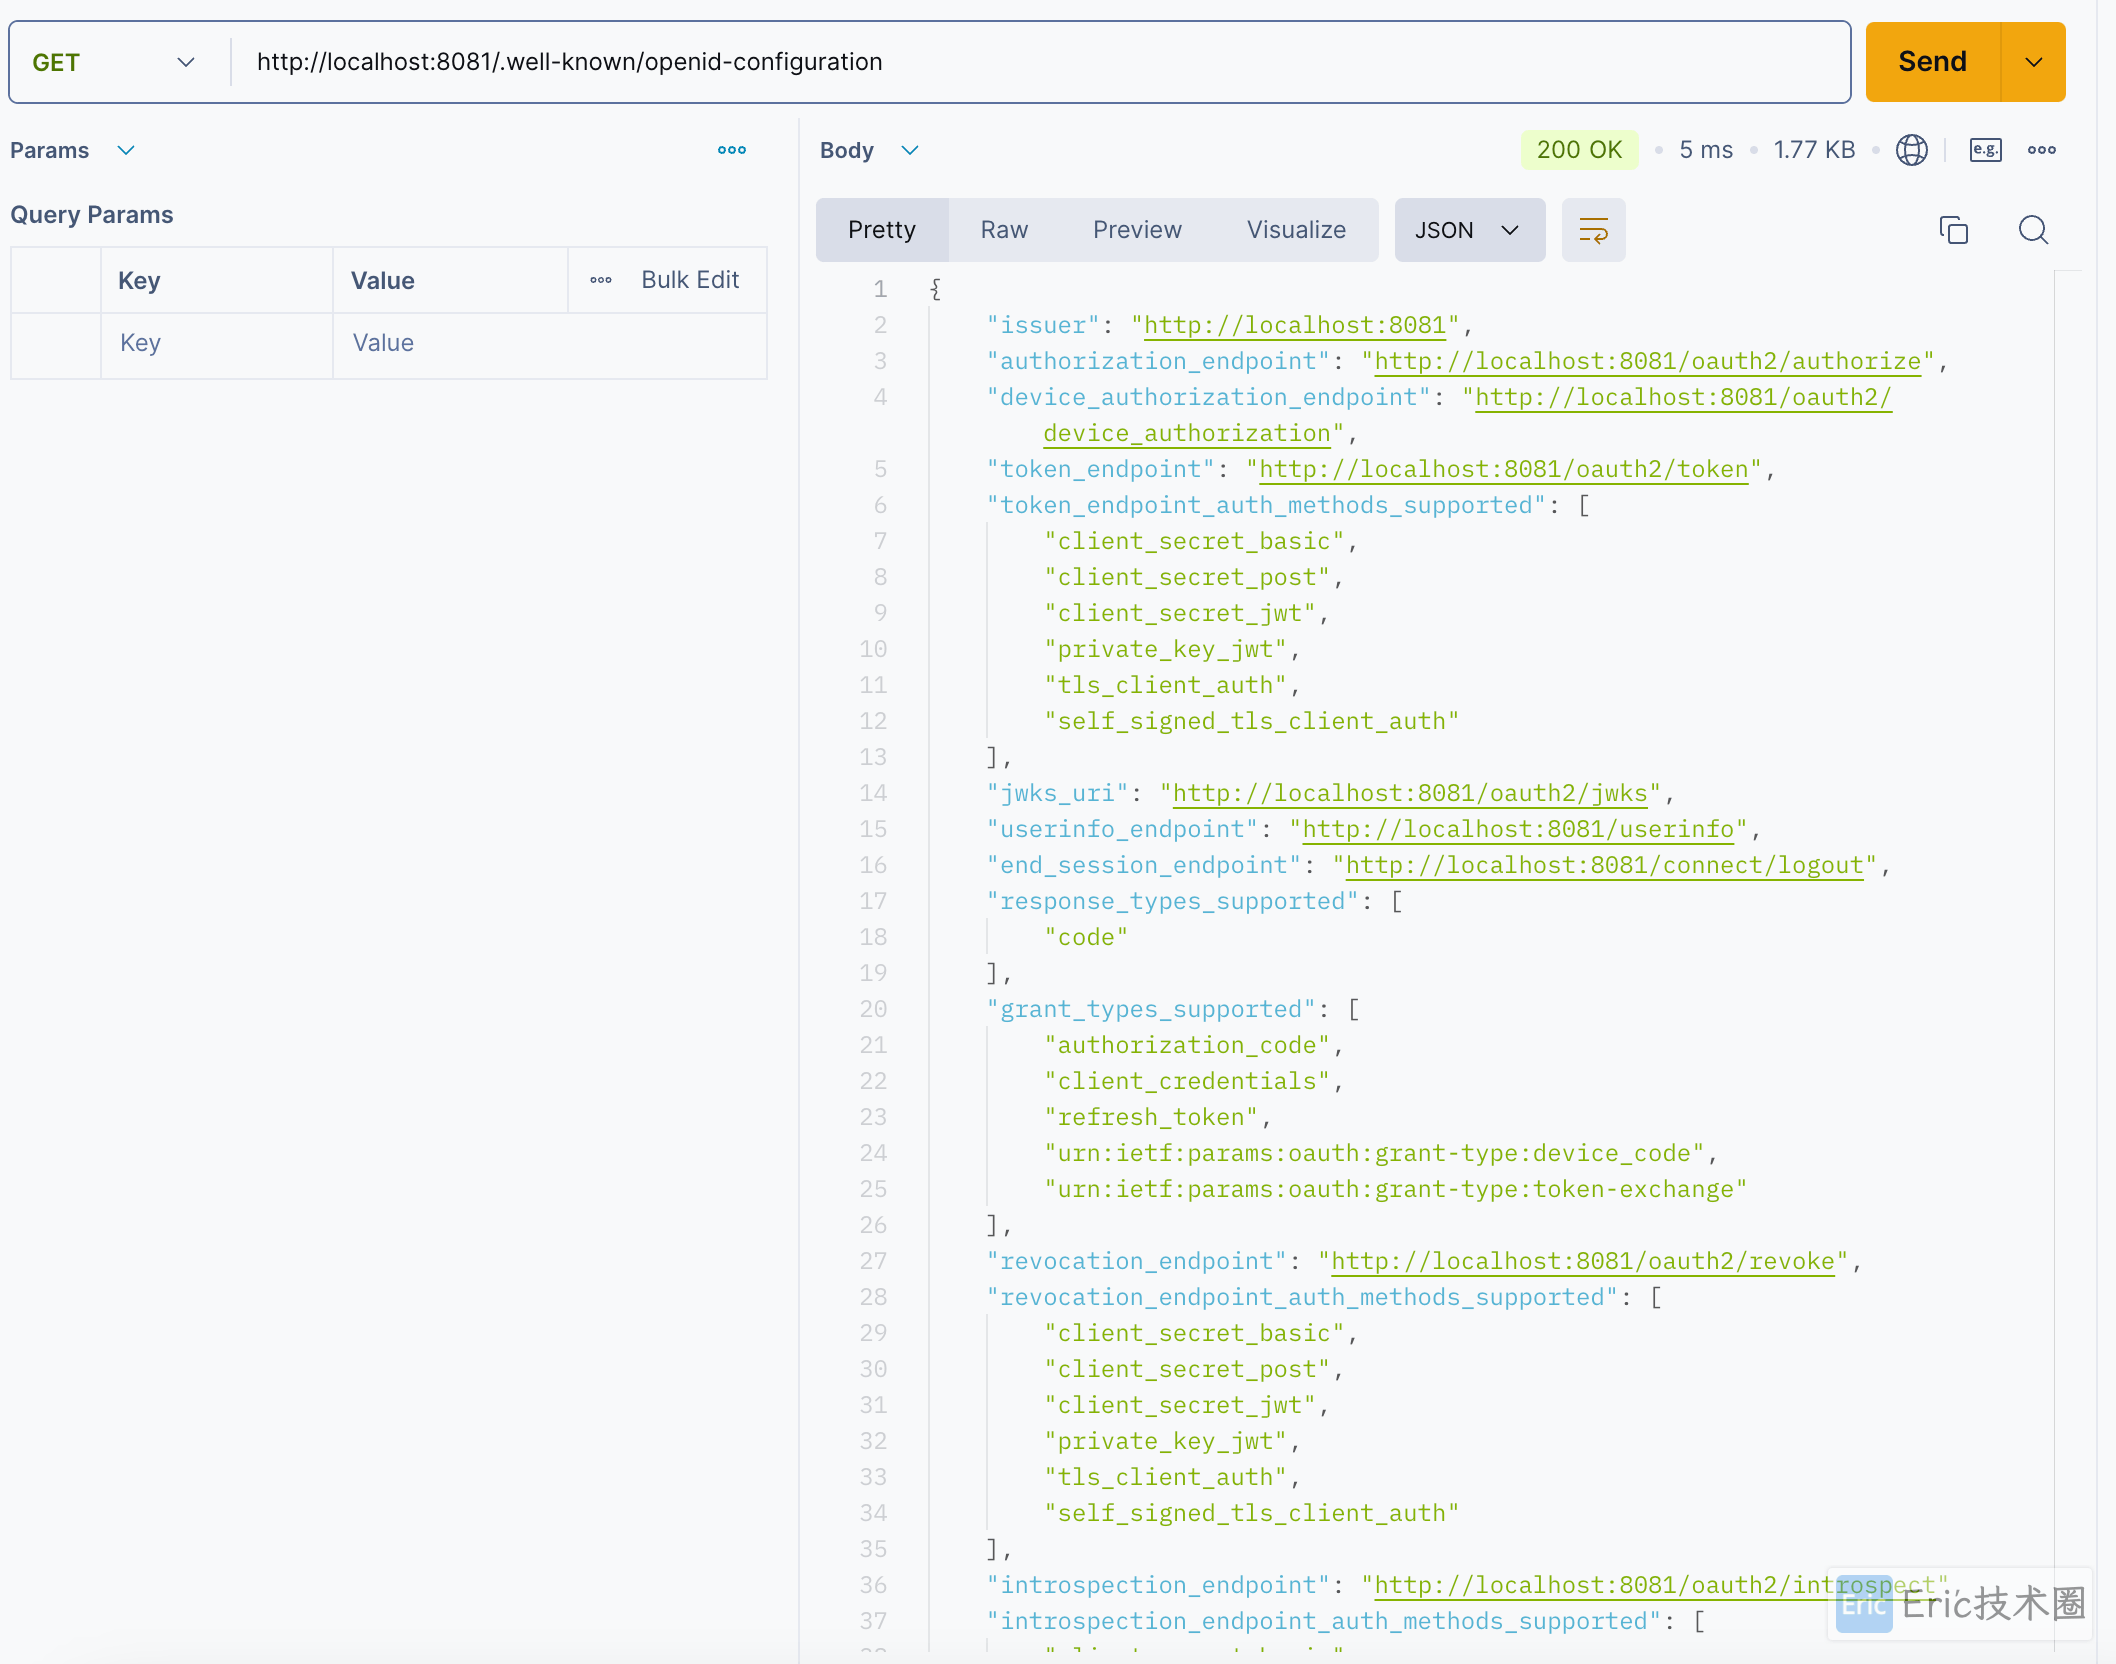
完整的 JSON 格式数据如下:
{
    "issuer": "http://localhost:8081",
    "authorization_endpoint": "http://localhost:8081/oauth2/authorize",
    "device_authorization_endpoint": "http://localhost:8081/oauth2/device_authorization",
    "token_endpoint": "http://localhost:8081/oauth2/token",
    "token_endpoint_auth_methods_supported": [
        "client_secret_basic",
        "client_secret_post",
        "client_secret_jwt",
        "private_key_jwt",
        "tls_client_auth",
        "self_signed_tls_client_auth"
    ],
    "jwks_uri": "http://localhost:8081/oauth2/jwks",
    "userinfo_endpoint": "http://localhost:8081/userinfo",
    "end_session_endpoint": "http://localhost:8081/connect/logout",
    "response_types_supported": [
        "code"
    ],
    "grant_types_supported": [
        "authorization_code",
        "client_credentials",
        "refresh_token",
        "urn:ietf:params:oauth:grant-type:device_code",
        "urn:ietf:params:oauth:grant-type:token-exchange"
    ],
    "revocation_endpoint": "http://localhost:8081/oauth2/revoke",
    "revocation_endpoint_auth_methods_supported": [
        "client_secret_basic",
        "client_secret_post",
        "client_secret_jwt",
        "private_key_jwt",
        "tls_client_auth",
        "self_signed_tls_client_auth"
    ],
    "introspection_endpoint": "http://localhost:8081/oauth2/introspect",
    "introspection_endpoint_auth_methods_supported": [
        "client_secret_basic",
        "client_secret_post",
        "client_secret_jwt",
        "private_key_jwt",
        "tls_client_auth",
        "self_signed_tls_client_auth"
    ],
    "code_challenge_methods_supported": [
        "S256"
    ],
    "tls_client_certificate_bound_access_tokens": true,
    "subject_types_supported": [
        "public"
    ],
    "id_token_signing_alg_values_supported": [
        "RS256"
    ],
    "scopes_supported": [
        "openid"
    ]
}以上的端点默认配置在类AuthorizationServerSettings 中:
public static Builder builder() {
  return new Builder()
      .authorizationEndpoint("/oauth2/authorize")
      .deviceAuthorizationEndpoint("/oauth2/device_authorization")
      .deviceVerificationEndpoint("/oauth2/device_verification")
      .tokenEndpoint("/oauth2/token")
      .jwkSetEndpoint("/oauth2/jwks")
      .tokenRevocationEndpoint("/oauth2/revoke")
      .tokenIntrospectionEndpoint("/oauth2/introspect")
      .oidcClientRegistrationEndpoint("/connect/register")
      .oidcUserInfoEndpoint("/userinfo")
      .oidcLogoutEndpoint("/connect/logout");
}
03 获取授权码
访问授权码地址:http://localhost:8080/api/auth-service/oauth2/authorize?response_type=code&client_id=eric-client&scope=openid&redirect_uri=http://127.0.0.1:8080/public/home ,会自动跳转到认证服务器的登陆页面。
response_type:code表示采用标准的 OAuth2 授权码模式
client_id:即客户端的id,即上面配置中在 RegisteredClientRepository 配置的
scope:请求授权范围,也需要在上面的配置中,注意这里的 scope 选择 openid,不然后续获取 userInfo 接口会报错,因为在
OidcUserInfoAuthenticationProvider类中进行了限制redirect_uri:授权通过后,重定向回来的地址,需要填写上面配置的跳转地址
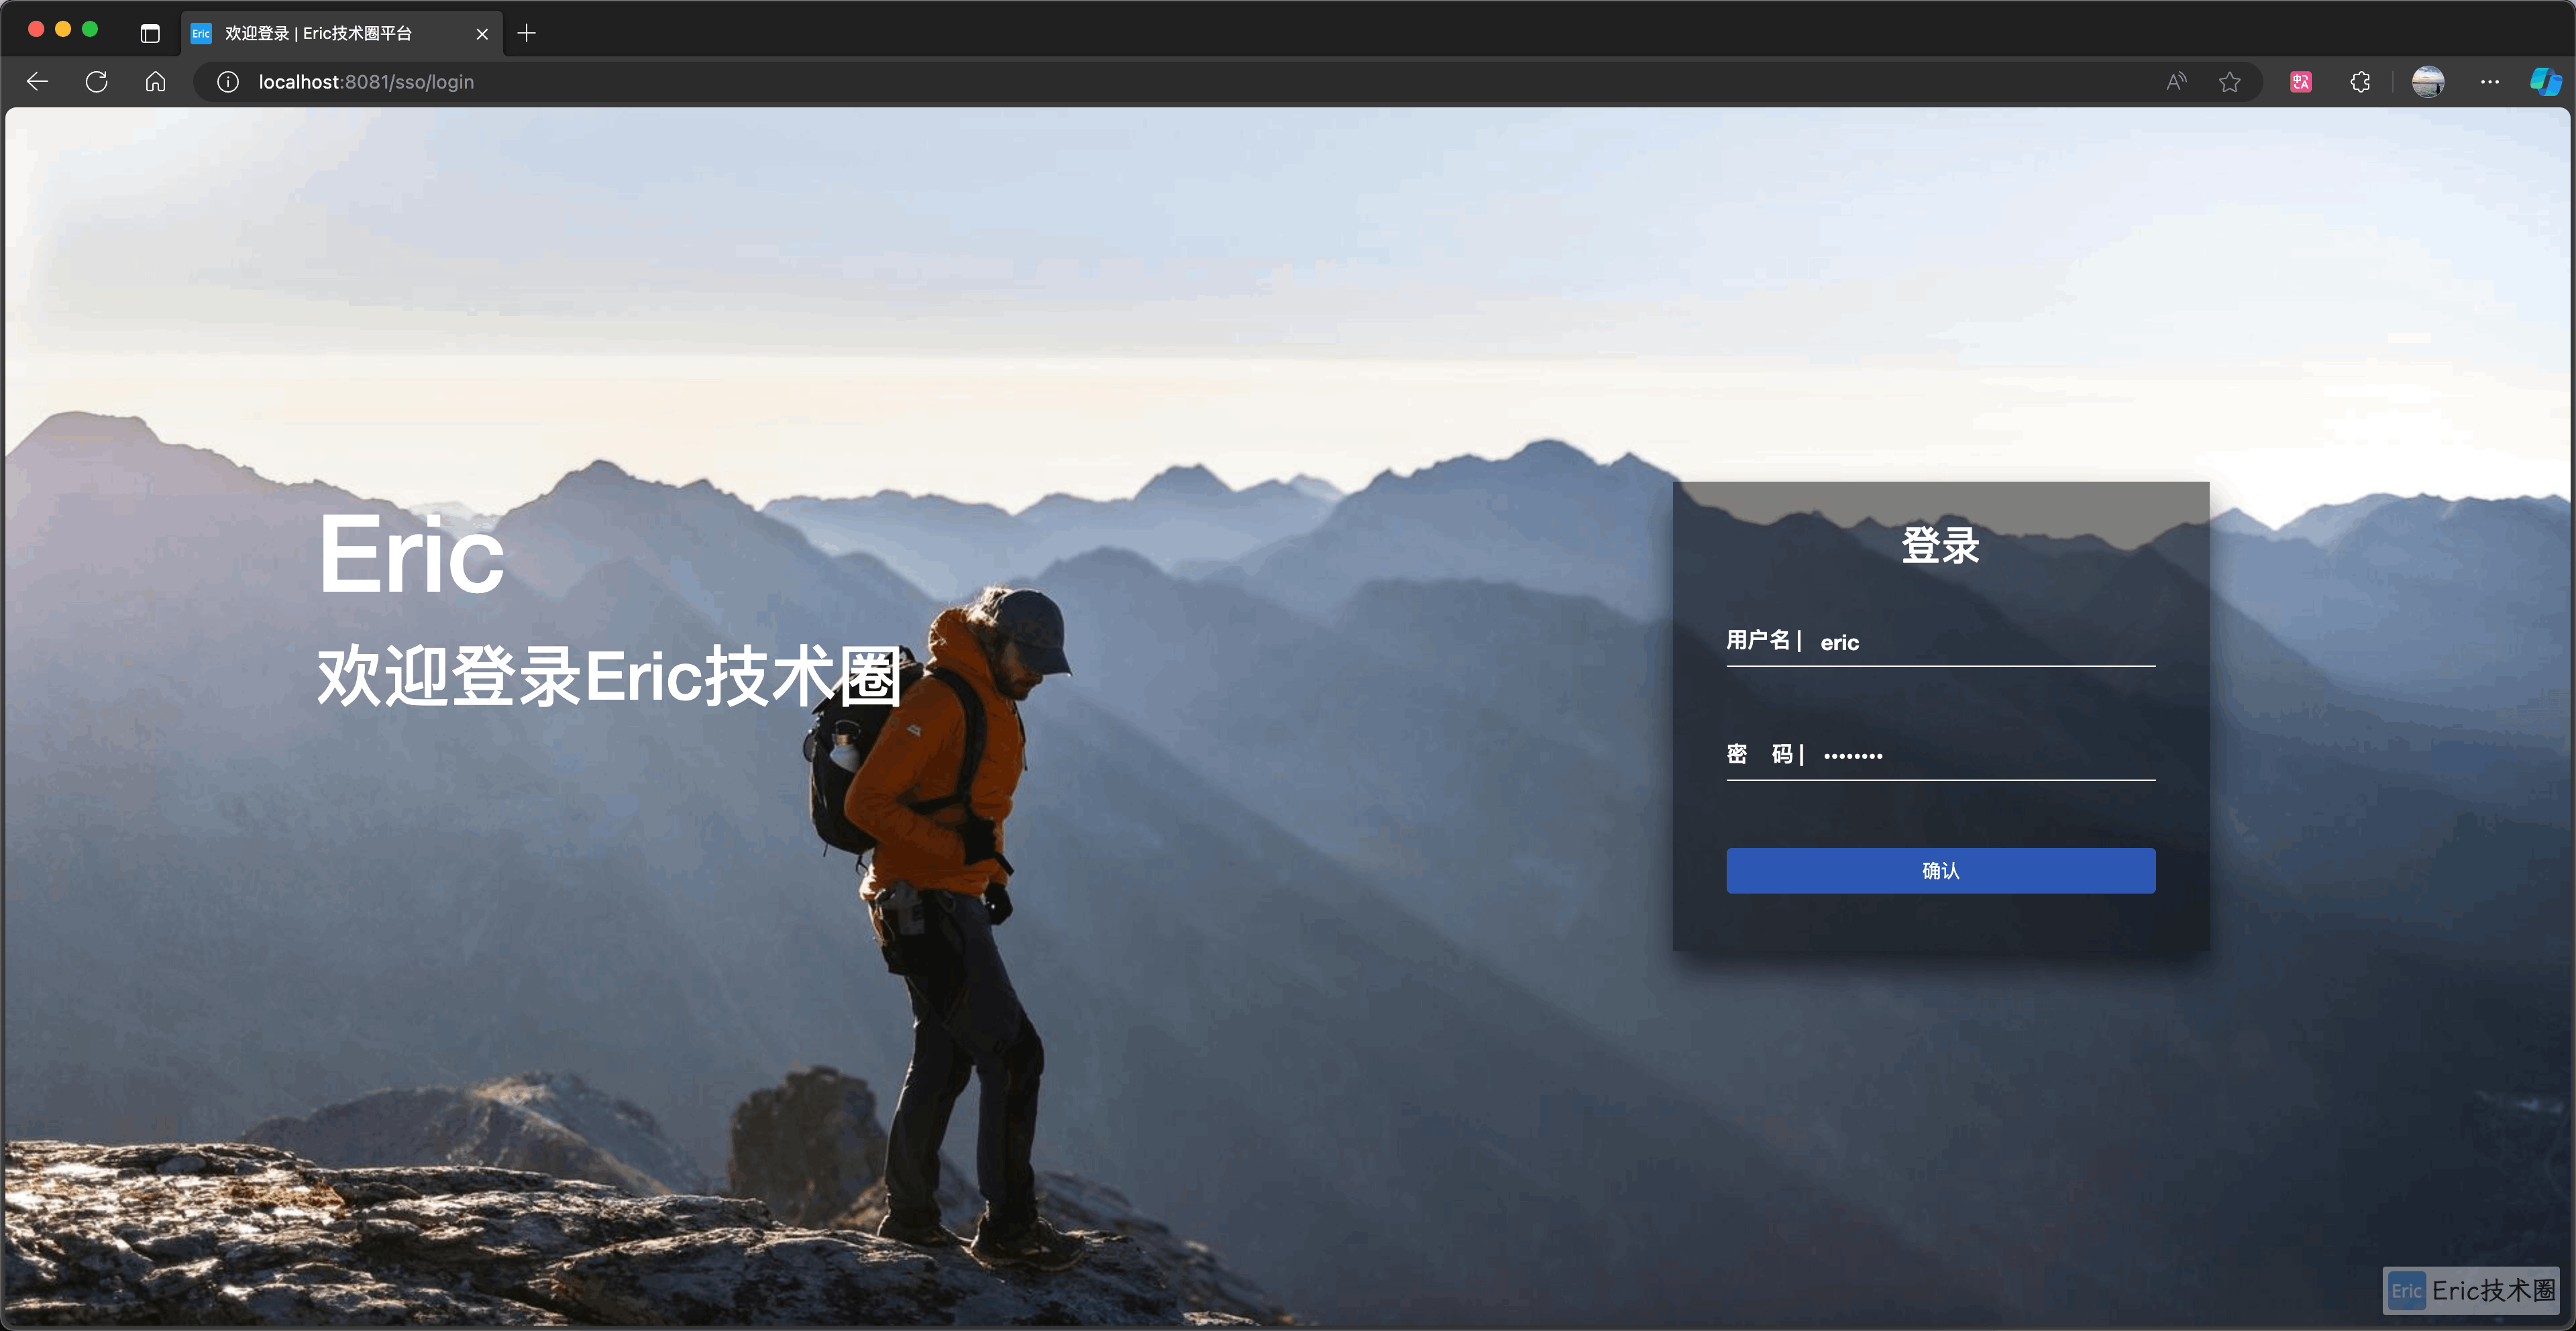
使用 username 和 password 进行登录,成功后自动跳转到回调地址,并显示出授权码 code 。

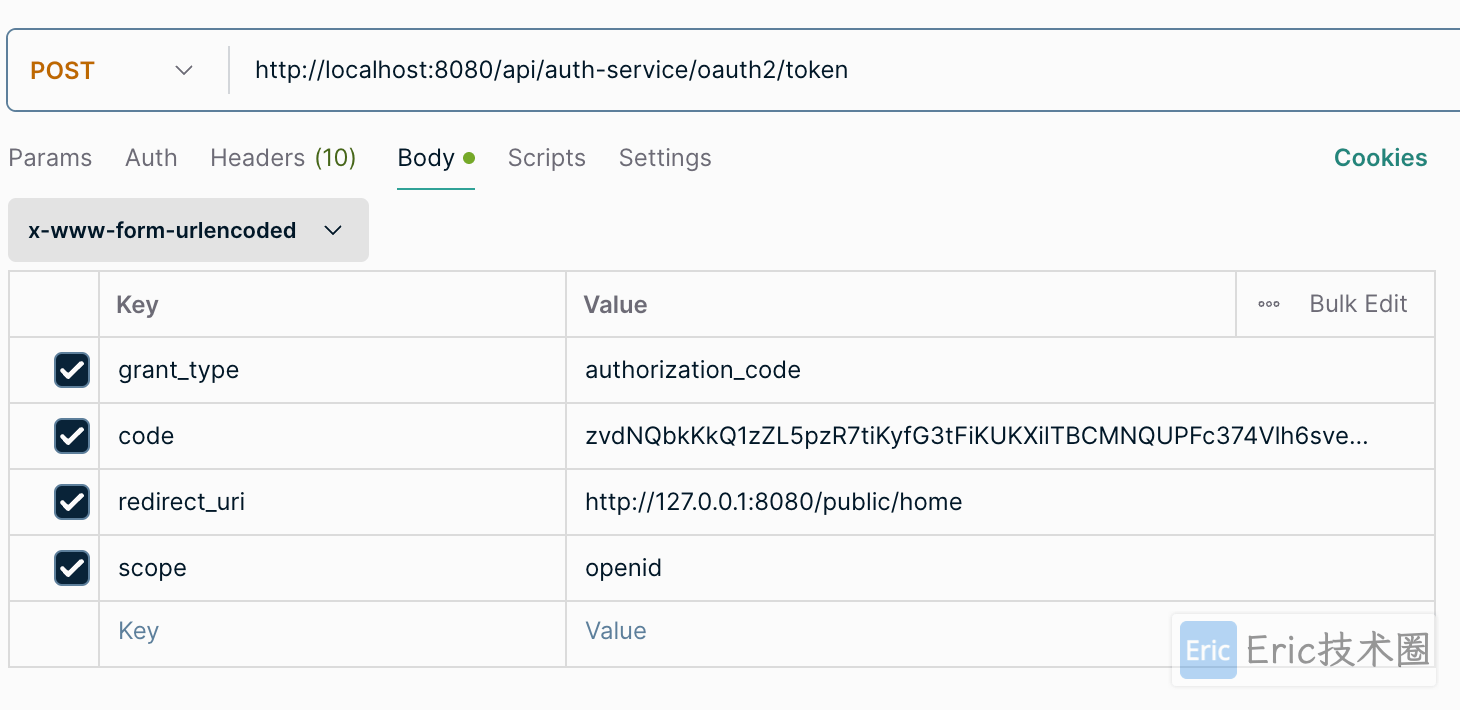
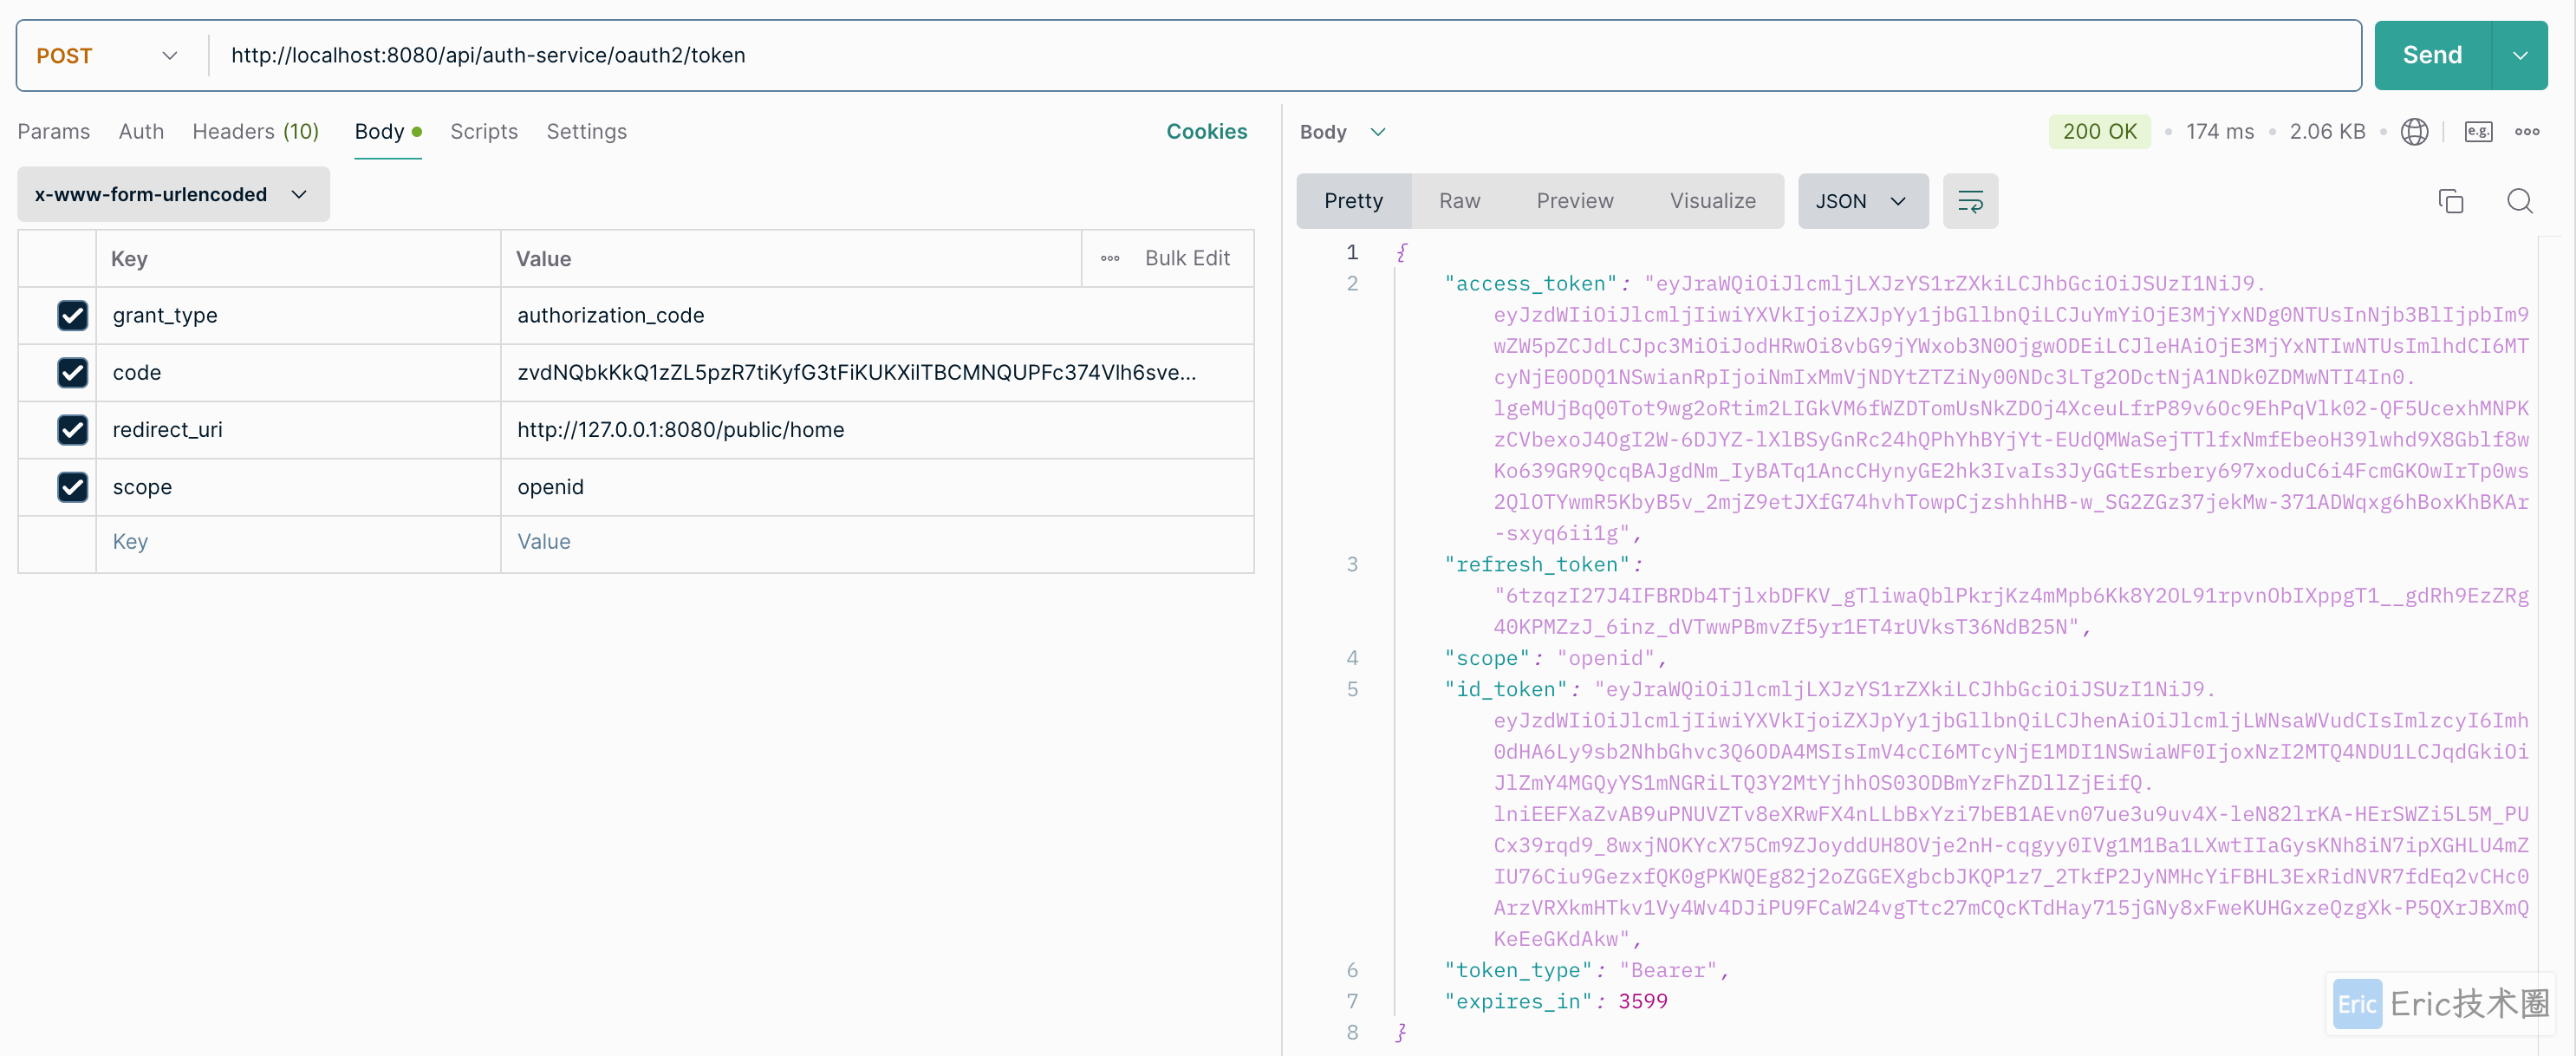
04 通过授权码获取 access_token
拷贝出之前获得的 code,调用接口 oauth2/token。
前面我们采用的客户端认证模式是client_secret_basic,所以需要将使用冒号:,将上面的 client_id和 client_secret进行拼接,再进行 base64 处理。在请求的 Header Authorization中添加:Basic ZXJpYy1jbGllbnQ6c2VjcmV0。
❯ echo -n "eric-client:secret" | base64
ZXJpYy1jbGllbnQ6c2VjcmV0
配置 Header:
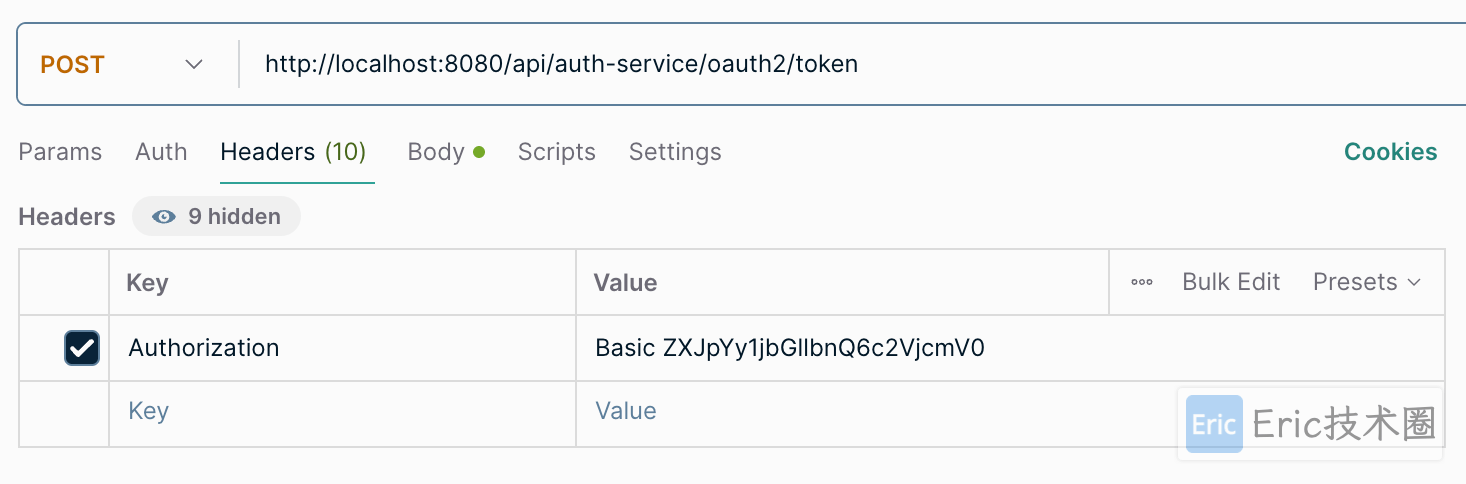
配置 Body:
请求结果:
oauth2 的 code 生成记录:
05 请求接口
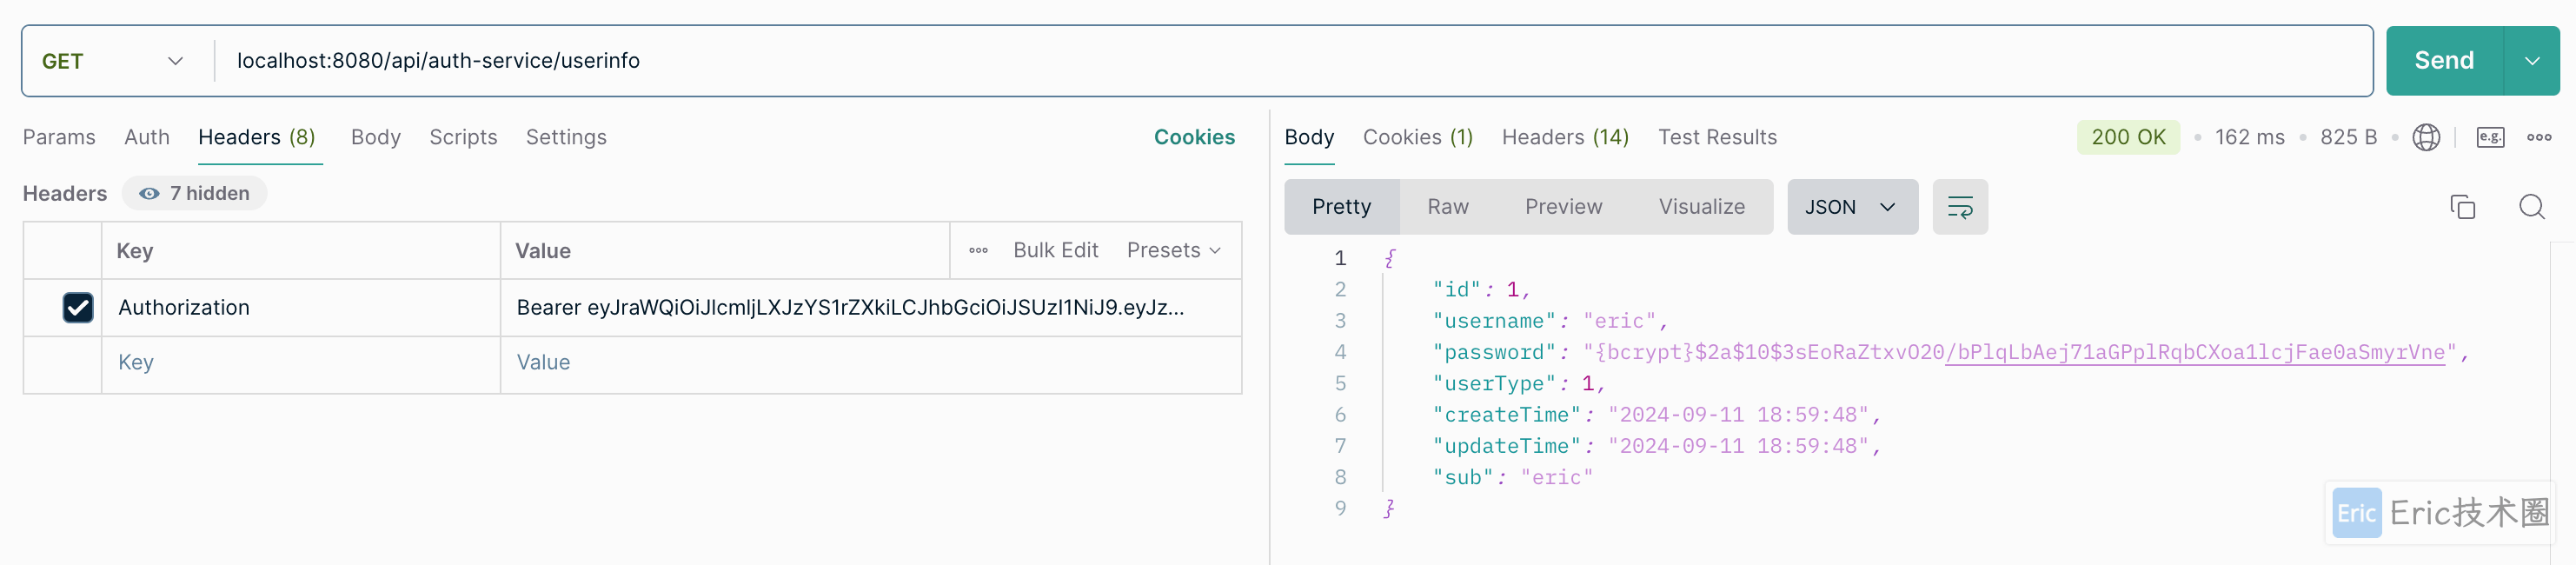
调用 auth-service 服务的 oidc 用户信息接口:
调用 order-service 服务的订单详情接口:

源码地址
Github: https://github.com/flyeric0212/eric-microservices-oauth2-demo