快速搭建本地大语言模型和知识库
见字如面,与大家分享实践中的经验与思考。
Ollama VS Hugging Face
在本地快速运行大模型,可以使用 Ollama 和 Hugging Face。
如果想通过 Hugging Face 本地快速访问大模型一般有两种方式:
Inference API (Serverless)
import requests API_URL = "https://api-inference.huggingface.co/models/meta-llama/Llama-2-7b-hf" headers = {"Authorization": "Bearer xxxxxxxxxxxxxxxxxxxxxxxxxxxxxxxxxxxxx"} def query(payload): response = requests.post(API_URL, headers=headers, json=payload) return response.json() output = query({ "inputs": "Can you please let us know more details about your ", })本地执行
# Use a pipeline as a high-level helper from transformers import pipeline pipe = pipeline("text-generation", model="meta-llama/Llama-2-7b-hf")
所以通过Hugging Face 对于不懂编程的人来说是比较困难的,一是需要申请API Key,二是需要本地有Python或者其他编程语言的环境。使用Ollama来运行本地大模型就非常的简单。
Ollama
Ollama的下载地址:https://ollama.com/download, 安装后直接在终端中执行如下命令:
ollama run llama2:7b一般来说,7b的模型至少需要8G RAM,13b需要16G,70b需要64G。
在没有进行任何LLM训练,也没有通过检索增强生成(RAG)的情况下,你可以看到如下的回答😂:
>>> what's the weather in Chengdu, China?
Currently, the weather in Chengdu, China is:
* Temperature: 24°C (75°F)
* Humidity: 60%
* Wind speed: 17 km/h (11 mph)
* Visibility: 10 km (6.2 miles)
* Sunrise time: 6:30 AM
* Sunset time: 7:00 PM
Please note that weather conditions can change rapidly and it's always a good idea to
check the most up-to-date forecast before planning any outdoor activities. You can find
more detailed information about the current weather in Chengdu on websites such as
AccuWeather or WeatherUnderground, or by checking with your local tourist information
office.
>>> what is today's date?
Today's date is March 14, 2023.
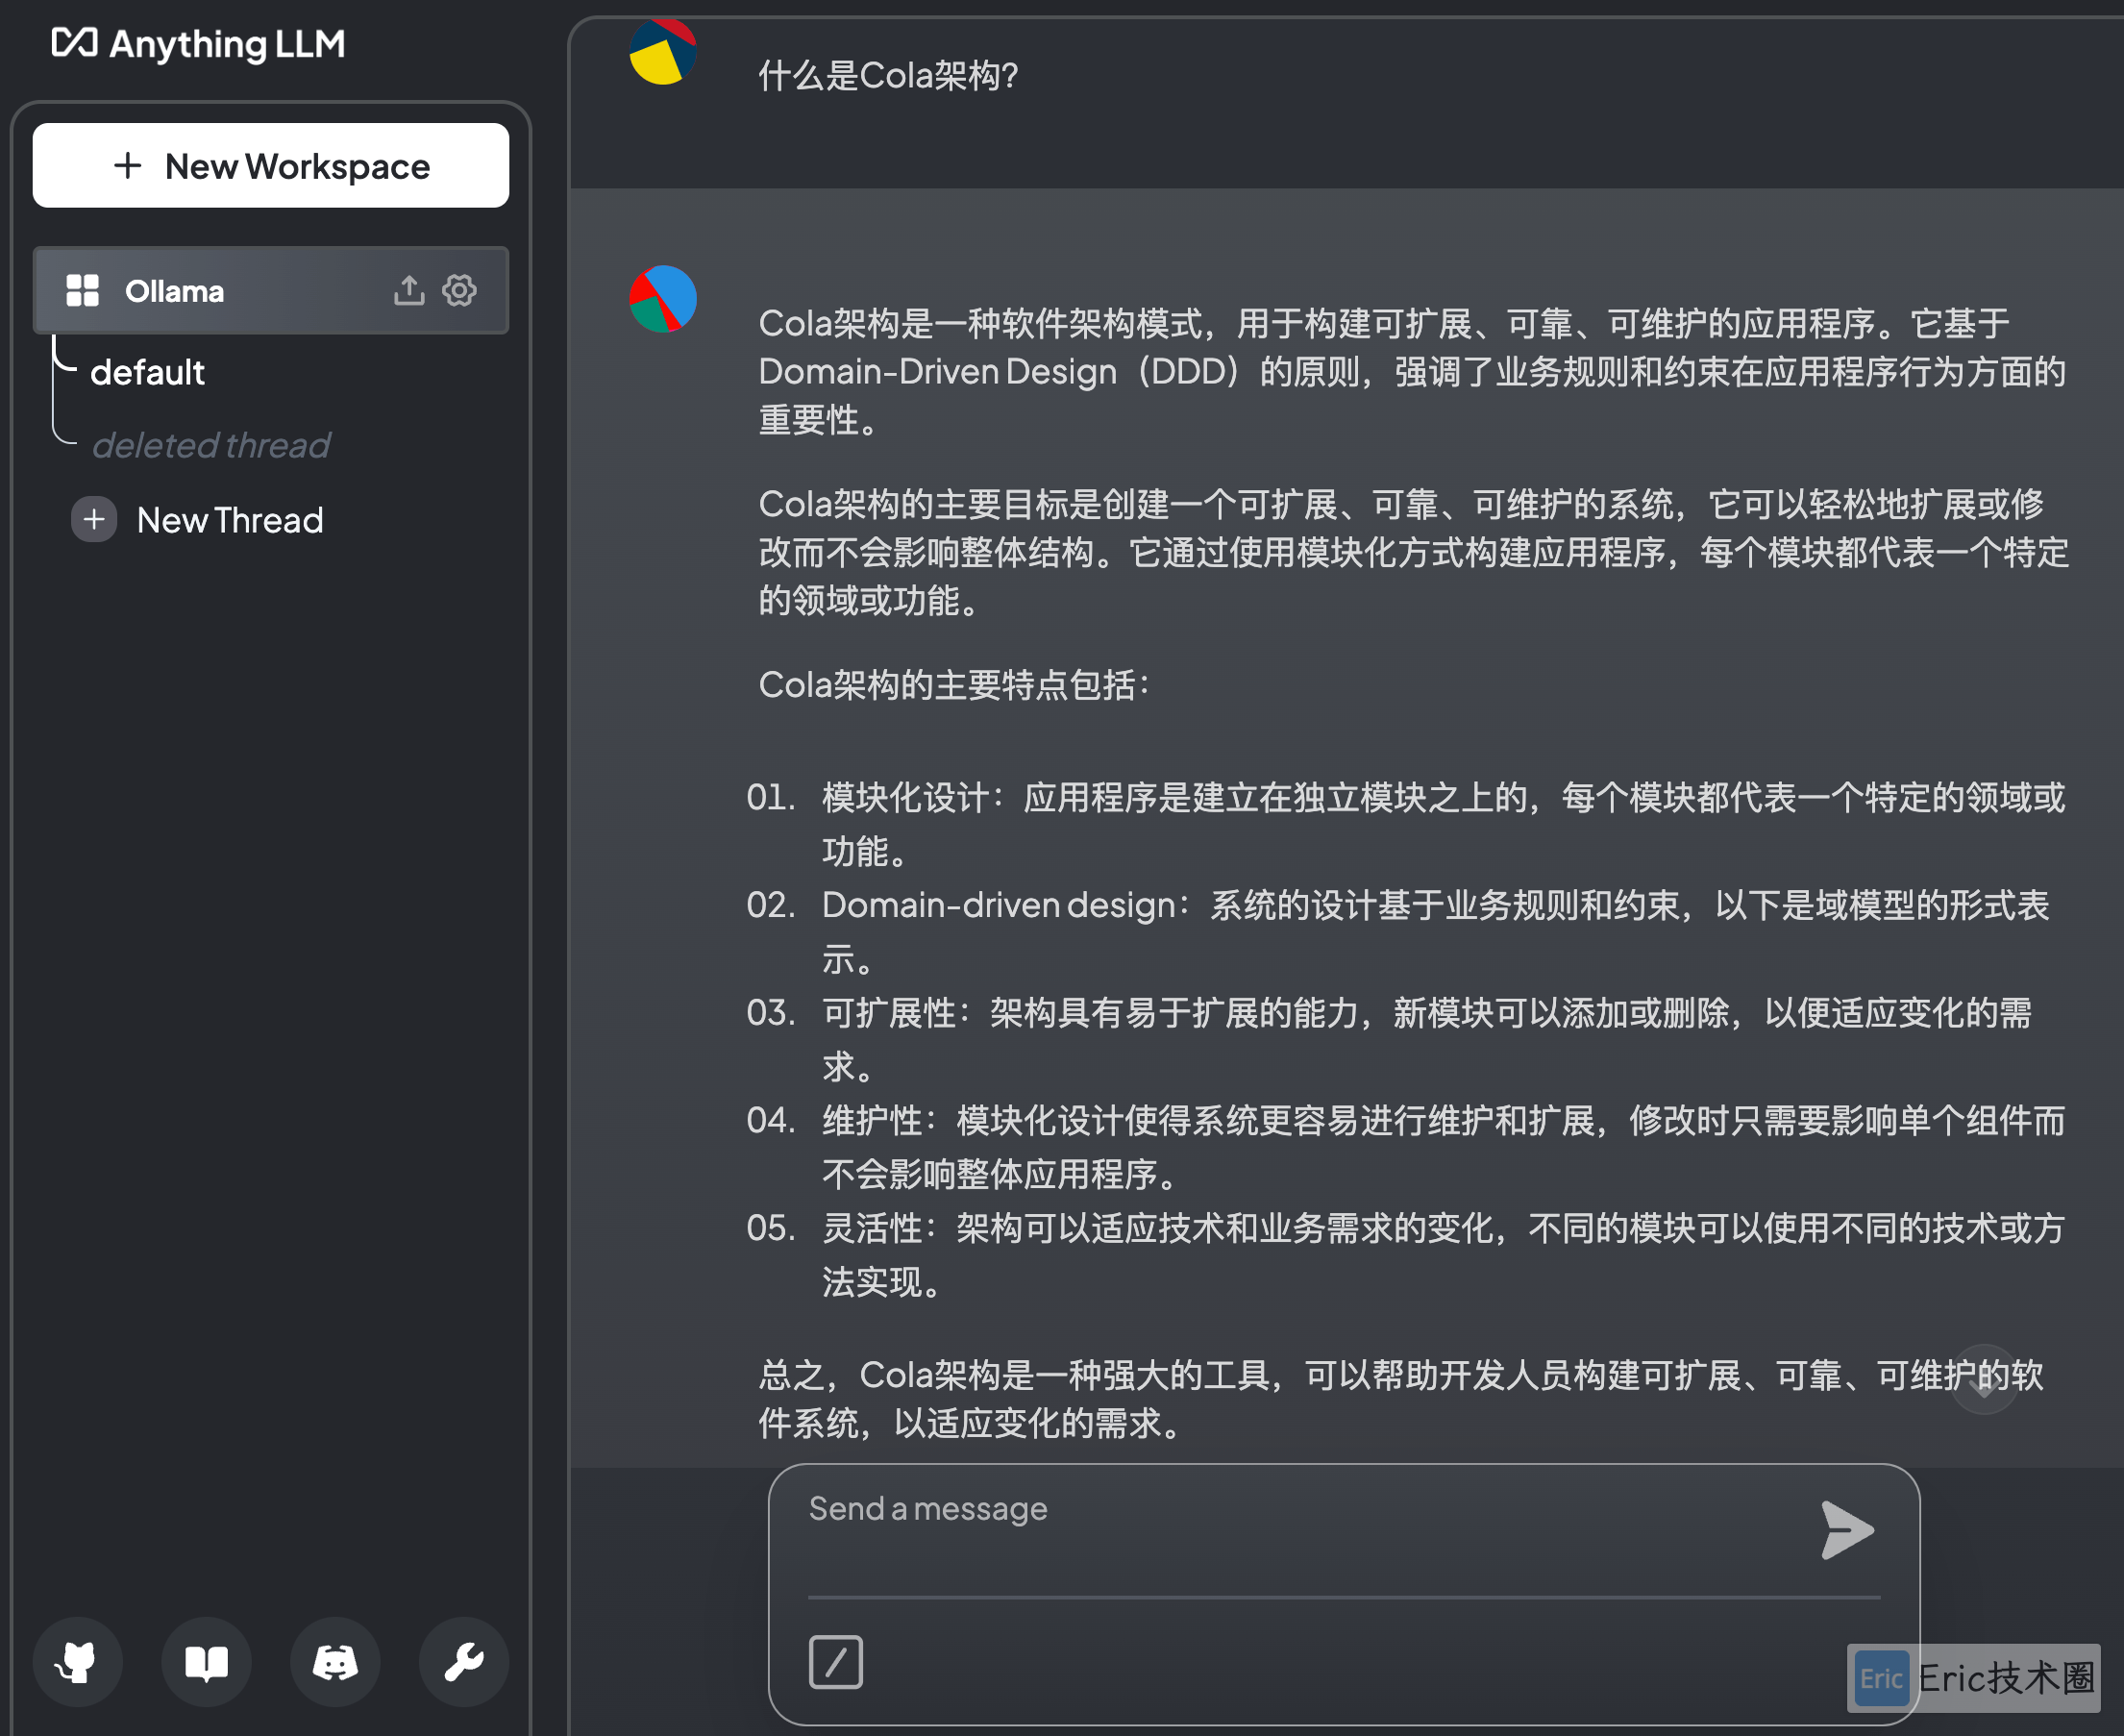
>>> what is DDD?
DDD (Domain-Driven Design) is an approach to software development that emphasizes the
importance of understanding and modeling the core business domain of an application.
The goal of DDD is to create a software system that is in line with the language,
concepts, and processes used by experts in the relevant domain.
DDD was first introduced by Eric Evans in his book "Domain-Driven Design: Tackling
Complexity in the Heart of Software". It is based on the idea that the best software
design emerges from a deep understanding of the business domain, and that this
understanding should be used to inform the design of the software.
The core principles of DDD are:
1. Focus on the domain: The primary focus of DDD is on the business domain being
modeled. This involves identifying the key concepts, entities, and behaviors of the
domain, and creating a model that captures these elements.
2. Build models, not frameworks: Rather than starting with a pre-defined framework or
set of rules, DDD emphasizes the importance of building models that are tailored to the
specific needs of the domain.
3. Define the ubiquitous language: DDD encourages developers to create a shared
vocabulary and set of concepts that can be used across the entire development team.
This helps ensure that everyone is on the same page when it comes to the domain model.
4. Use the model to drive design: The domain model is seen as the primary driver of
software design in DDD. Developers should use the model to inform their design
decisions, rather than starting with a pre-defined architecture or set of requirements.
5. Foster collaboration: DDD emphasizes the importance of collaboration between
developers, domain experts, and other stakeholders. This helps ensure that the software
is grounded in a deep understanding of the business domain, and that it meets the needs
of all stakeholders.
By following these principles, DDD aims to create software systems that are more
robust, flexible, and sustainable than those developed using traditional methods.快速切换另外一种模型:
[14:26:42] .ollama $ ollama run codellama
>>> Help me write a quicksort algorithm?
Quicksort is a sorting algorithm that uses the divide-and-conquer technique to sort an
array of elements. It is a fast and efficient algorithm, with a time complexity of O(n
log n) on average.
Here is a basic outline of how quicksort works:
1. Choose a pivot element from the array. The pivot element is usually the first
element in the array, but it can be any element that you choose.
2. Partition the array around the pivot element. This means that all elements less than
the pivot element are placed on the left side of the pivot element, and all elements
greater than the pivot element are placed on the right side.
3. Recursively apply the quicksort algorithm to the left and right subarrays of the
partitioned array.
4. Once the recursive calls have been made, combine the sorted left and right subarrays
with the pivot element in the middle.
Here is an example implementation of quicksort in JavaScript:
```
function quicksort(arr) {
if (arr.length <= 1) {
return arr;
}
let pivot = arr[0];
let left = [];
let right = [];
for (let i = 1; i < arr.length; i++) {
if (arr[i] < pivot) {
left.push(arr[i]);
} else {
right.push(arr[i]);
}
}
return quicksort(left).concat([pivot], quicksort(right));
}
```
This implementation uses the first element of the array as the pivot element, and
partitions the array around it. It then recursively applies the quicksort algorithm to
the left and right subarrays, and combines them with the pivot element in the middle.
You can call the `quicksort` function on an array of elements like this:
```
let arr = [3, 5, 2, 7, 1, 9];
console.log(quicksort(arr)); // Output: [1, 2, 3, 5, 7, 9]
```
This will sort the array in ascending order and print it to the console.
>>> Send a message (/? for help)本地资源占用情况:
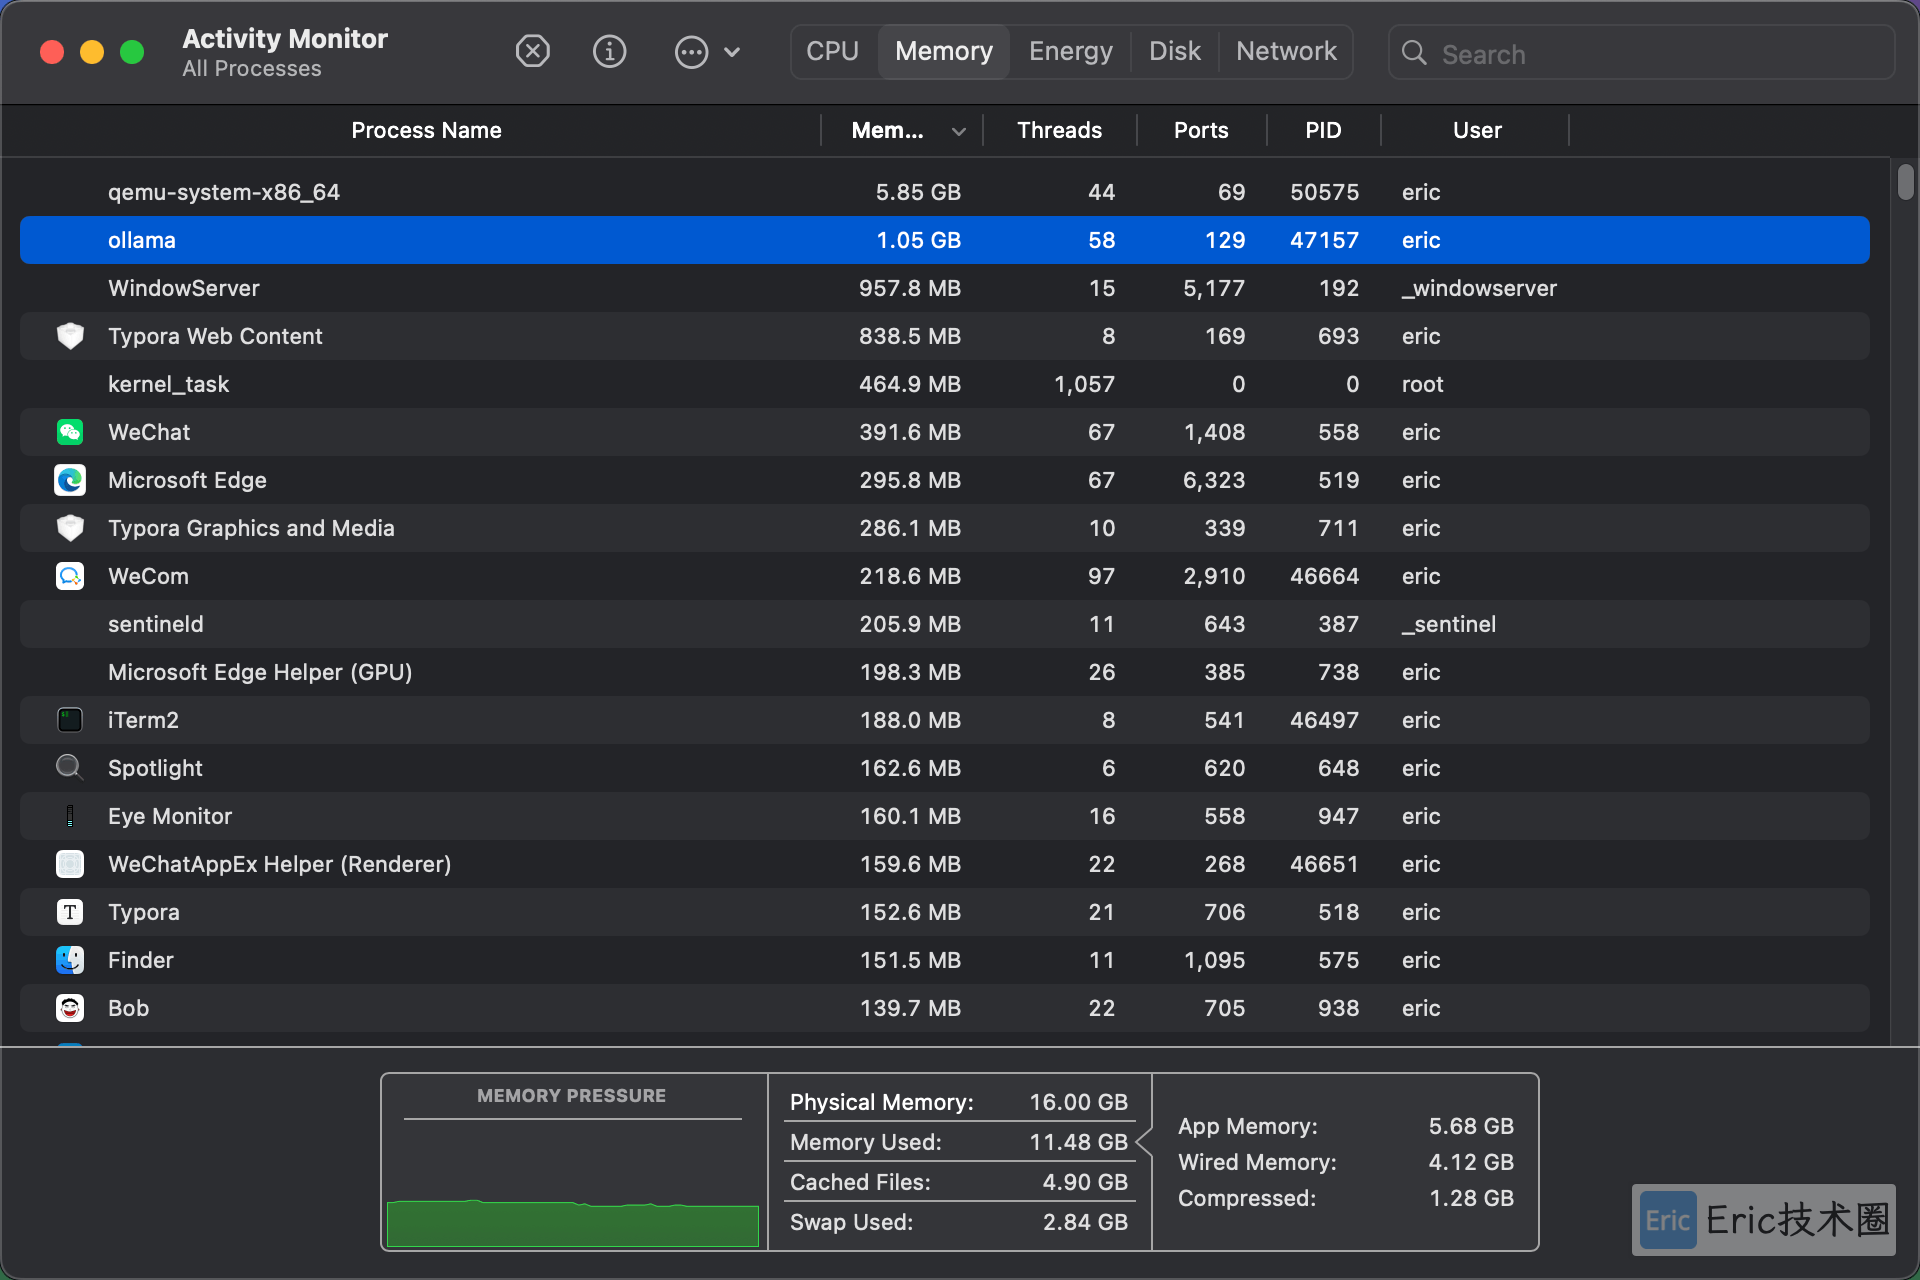
以下是一些可以下载的示例模型,也可到官方网站查看可支持的model列表:https://ollama.com/library:
AnythingLLM
可以通过AnythingLLM等现代化界面进行交互,而不是终端的方式。
Ollama其实有两种模式:
聊天模式
服务器模式
这里使用服务器模式,Ollama在后端运行大模型,开发ip和端口给外部软件使用。
ollama serve通过终端或者命令行,访问http://localhost:11434 进行验证:
curl http://localhost:11434
Ollama is running
搭建一个本地知识库,会涉及到三个关键:
LLM Model,大语言模型。它负责处理和理解自然语言。
Embedding Model,嵌入模型。它负责把高维度的数据转化为低维度的嵌入空间。这个数据处理过程在RAG中非常重要。
Vector Store,向量数据库,专门用来高效处理大规模向量数据。
本地容器化安装AnyThingLLM
参考文档:https://github.com/Mintplex-Labs/anything-llm/blob/master/docker/HOW_TO_USE_DOCKER.md
Linux或MacOS执行如下命令:
export STORAGE_LOCATION=$HOME/Documents/data/anythingllm && \
mkdir -p $STORAGE_LOCATION && \
touch "$STORAGE_LOCATION/.env" && \
docker run -d -p 3001:3001 \
--cap-add SYS_ADMIN \
-v ${STORAGE_LOCATION}:/app/server/storage \
-v ${STORAGE_LOCATION}/.env:/app/server/.env \
-e STORAGE_DIR="/app/server/storage" \
mintplexlabs/anythingllm
使用 http://localhost:3001 访问。
删除多余的container:
docker rm $(docker ps --filter status=exited -q)官方有一段这样的描述:
If you are in docker and cannot connect to a service running on your host machine running on a local interface or loopback:
localhost
127.0.0.1
0.0.0.0
On linux http://host.docker.internal:xxxx does not work. Use http://172.17.0.1:xxxx instead to emulate this functionality.
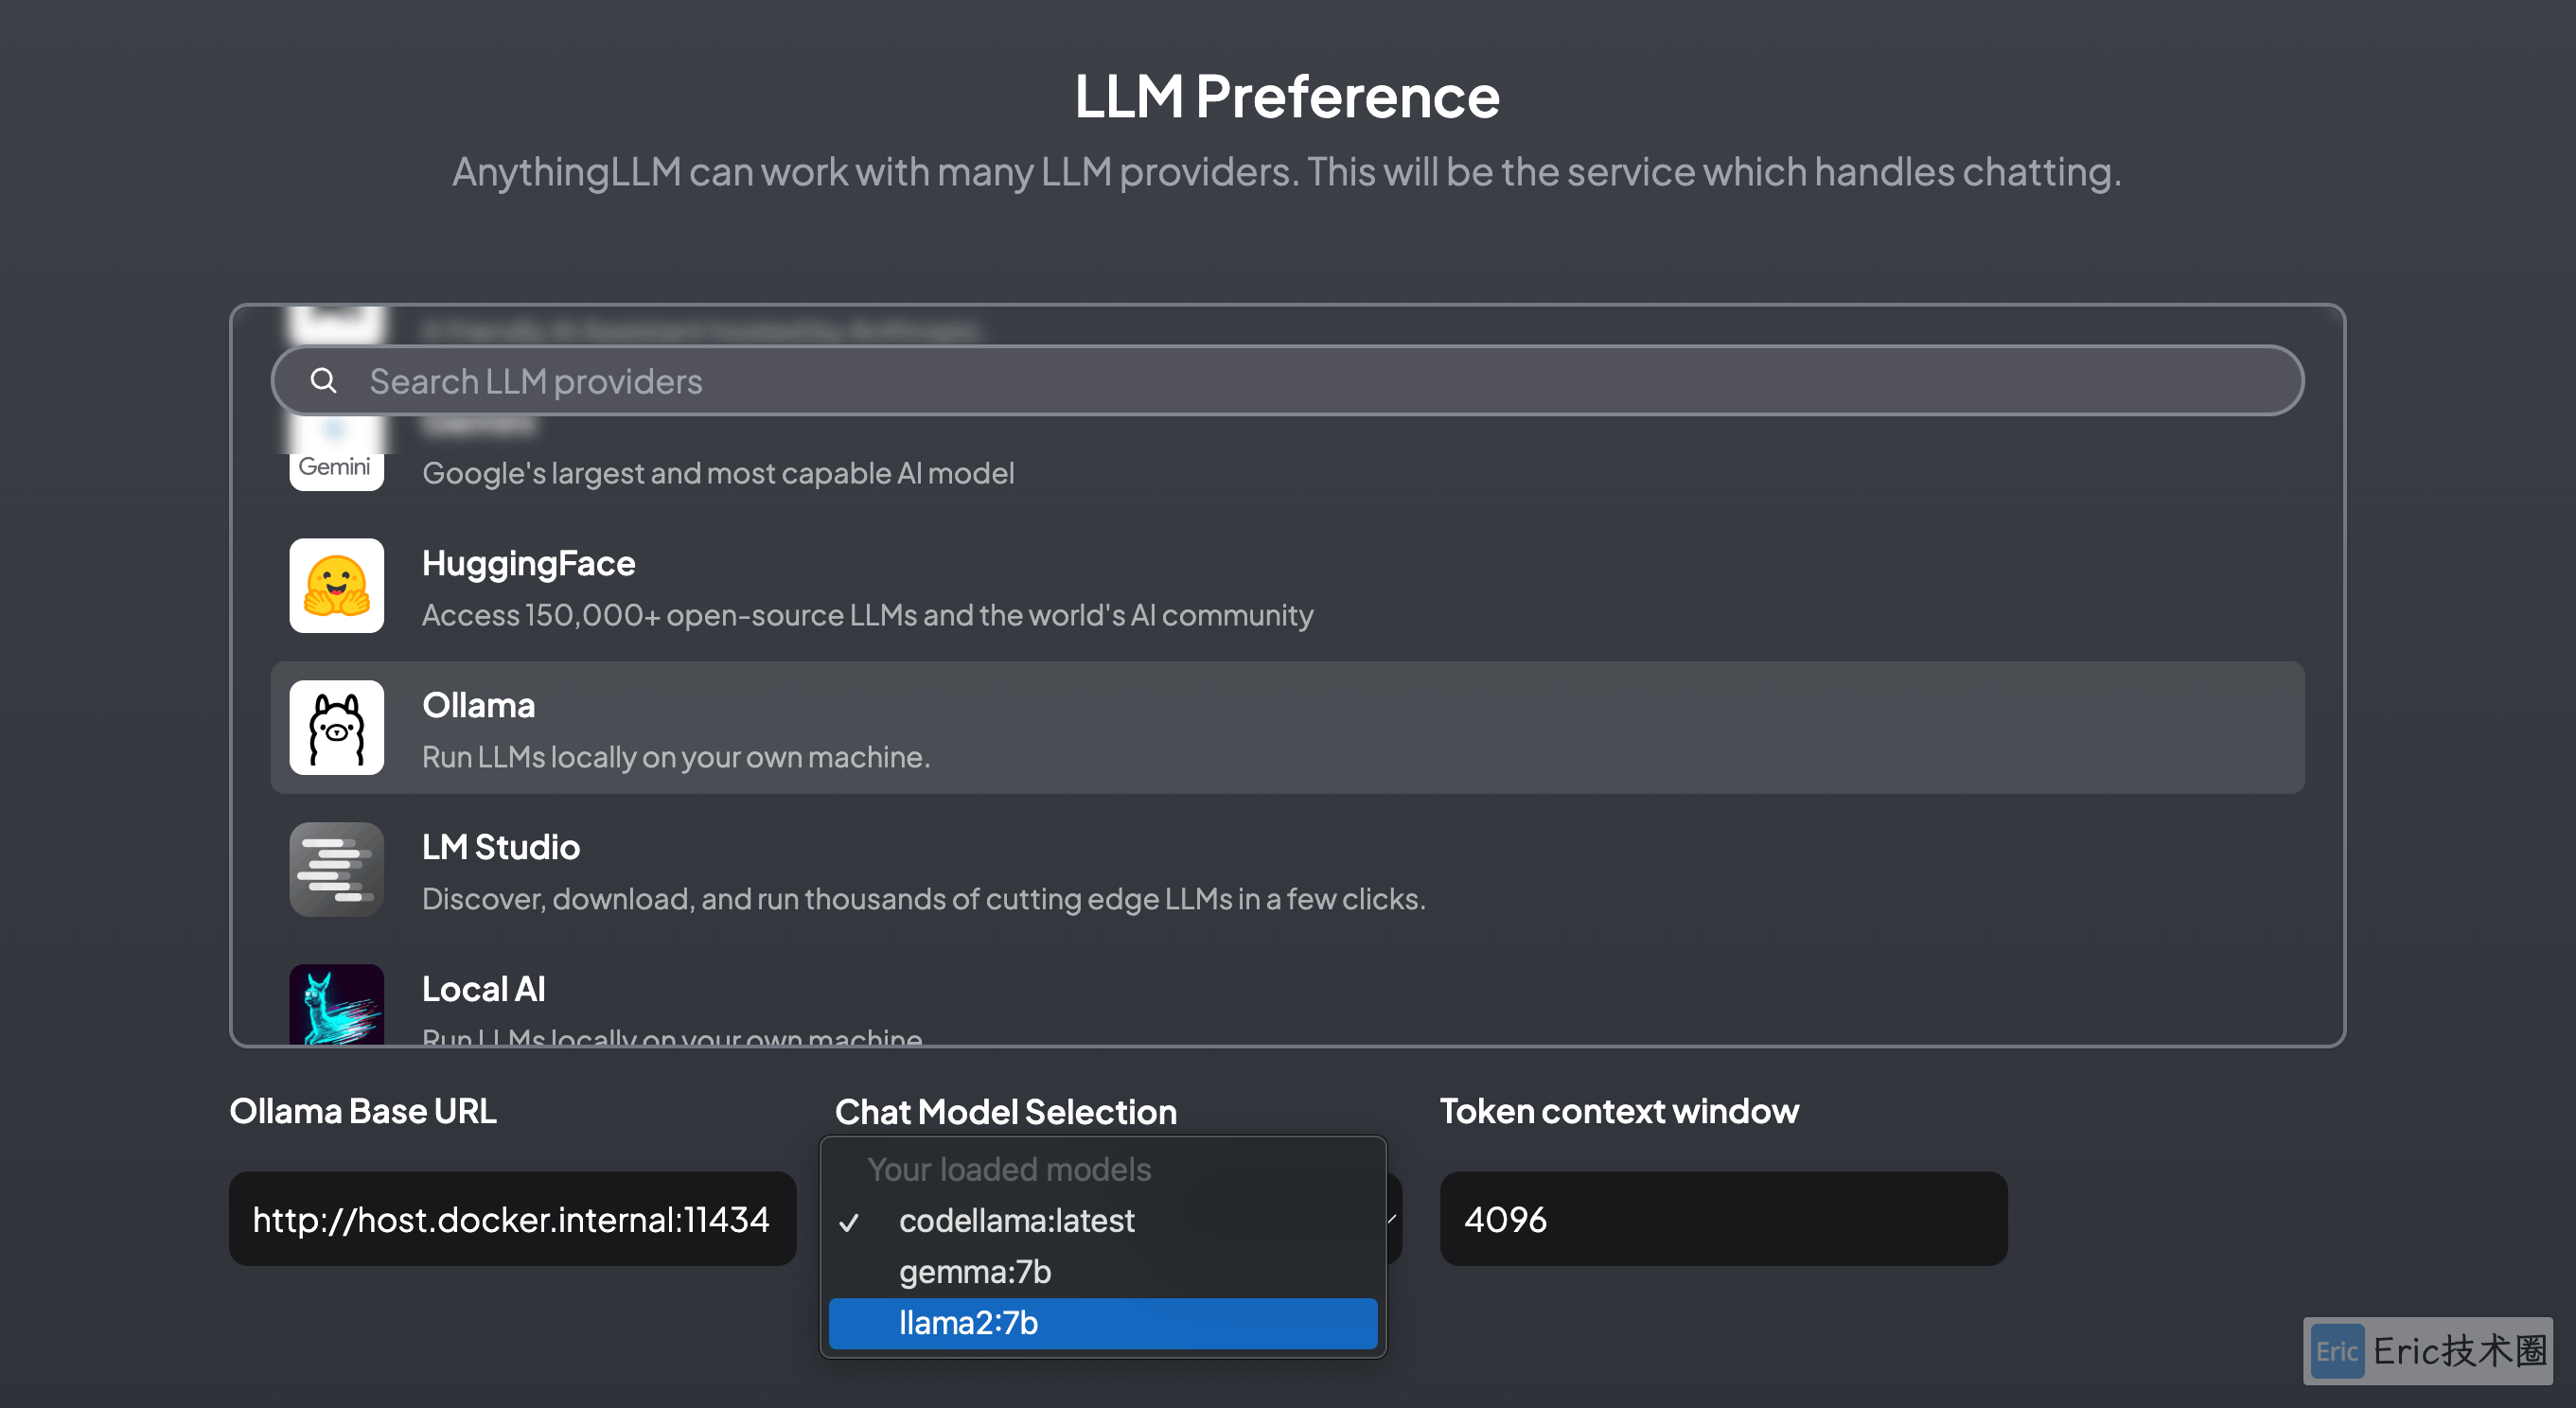
Then in docker you need to replace that localhost part with host.docker.internal. For example, if running Ollama on the host machine, bound to http://127.0.0.1:11434 you should put http://host.docker.internal:11434 into the connection URL in AnythingLLM.本地大模型选择
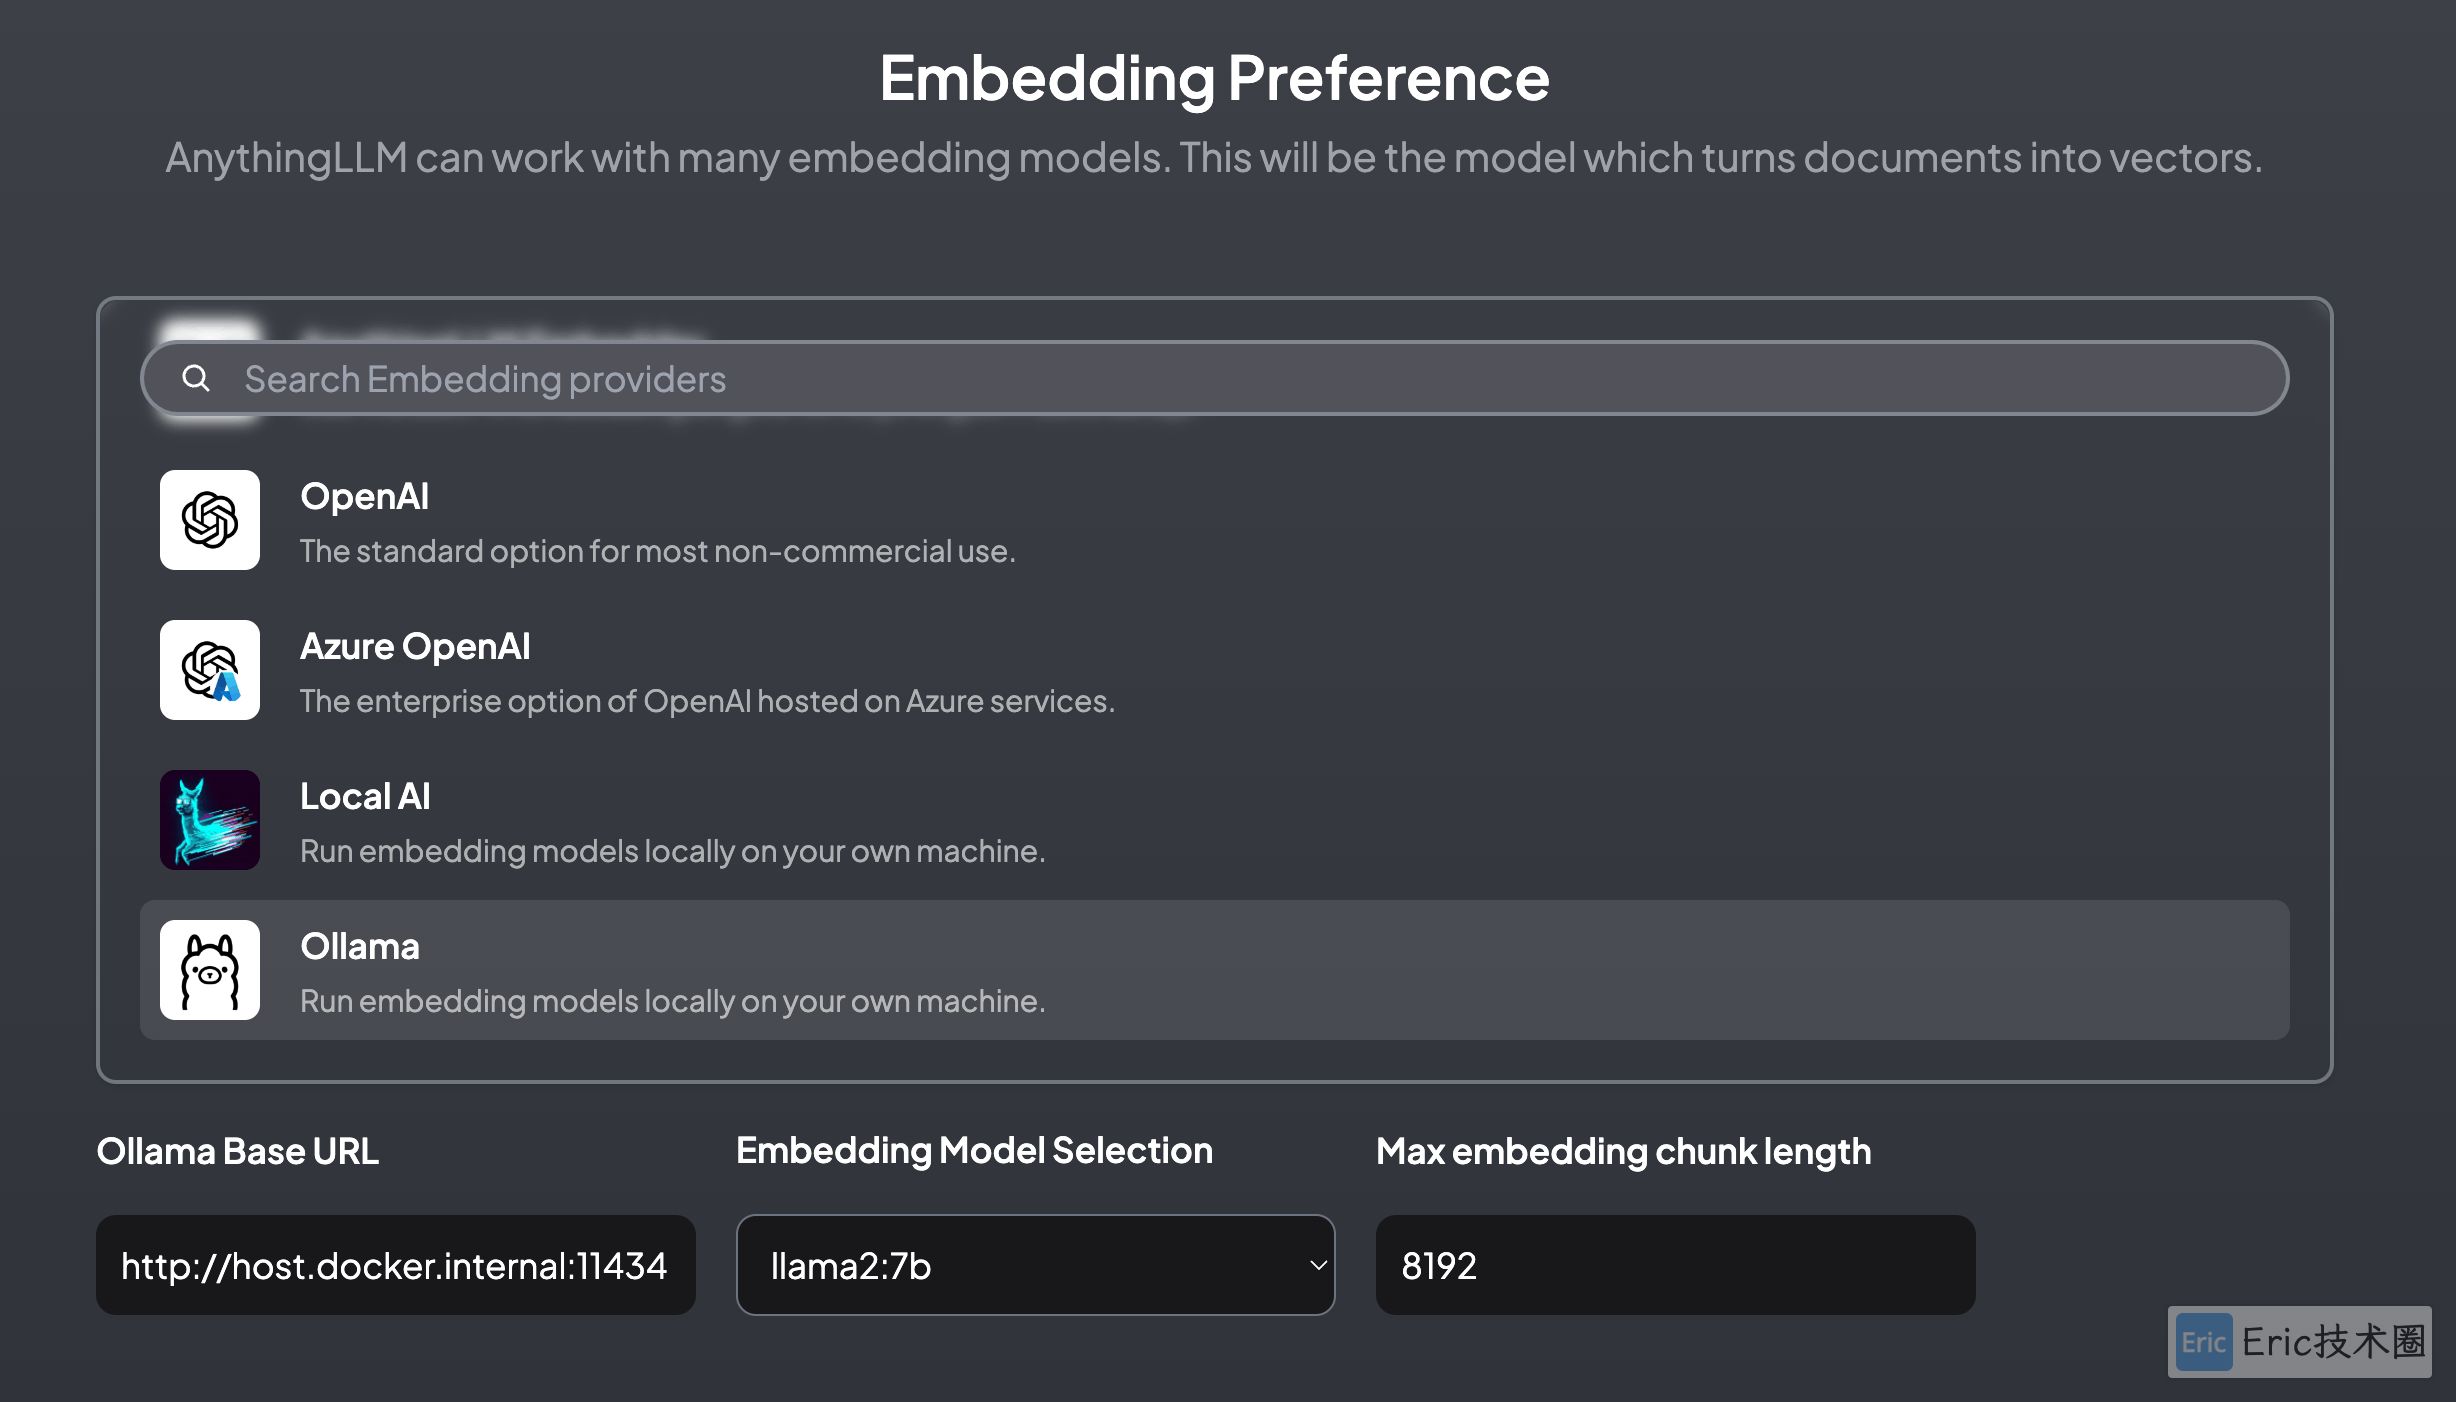
embedding配置
可以选择:https://ollama.com/library/nomic-embed-text
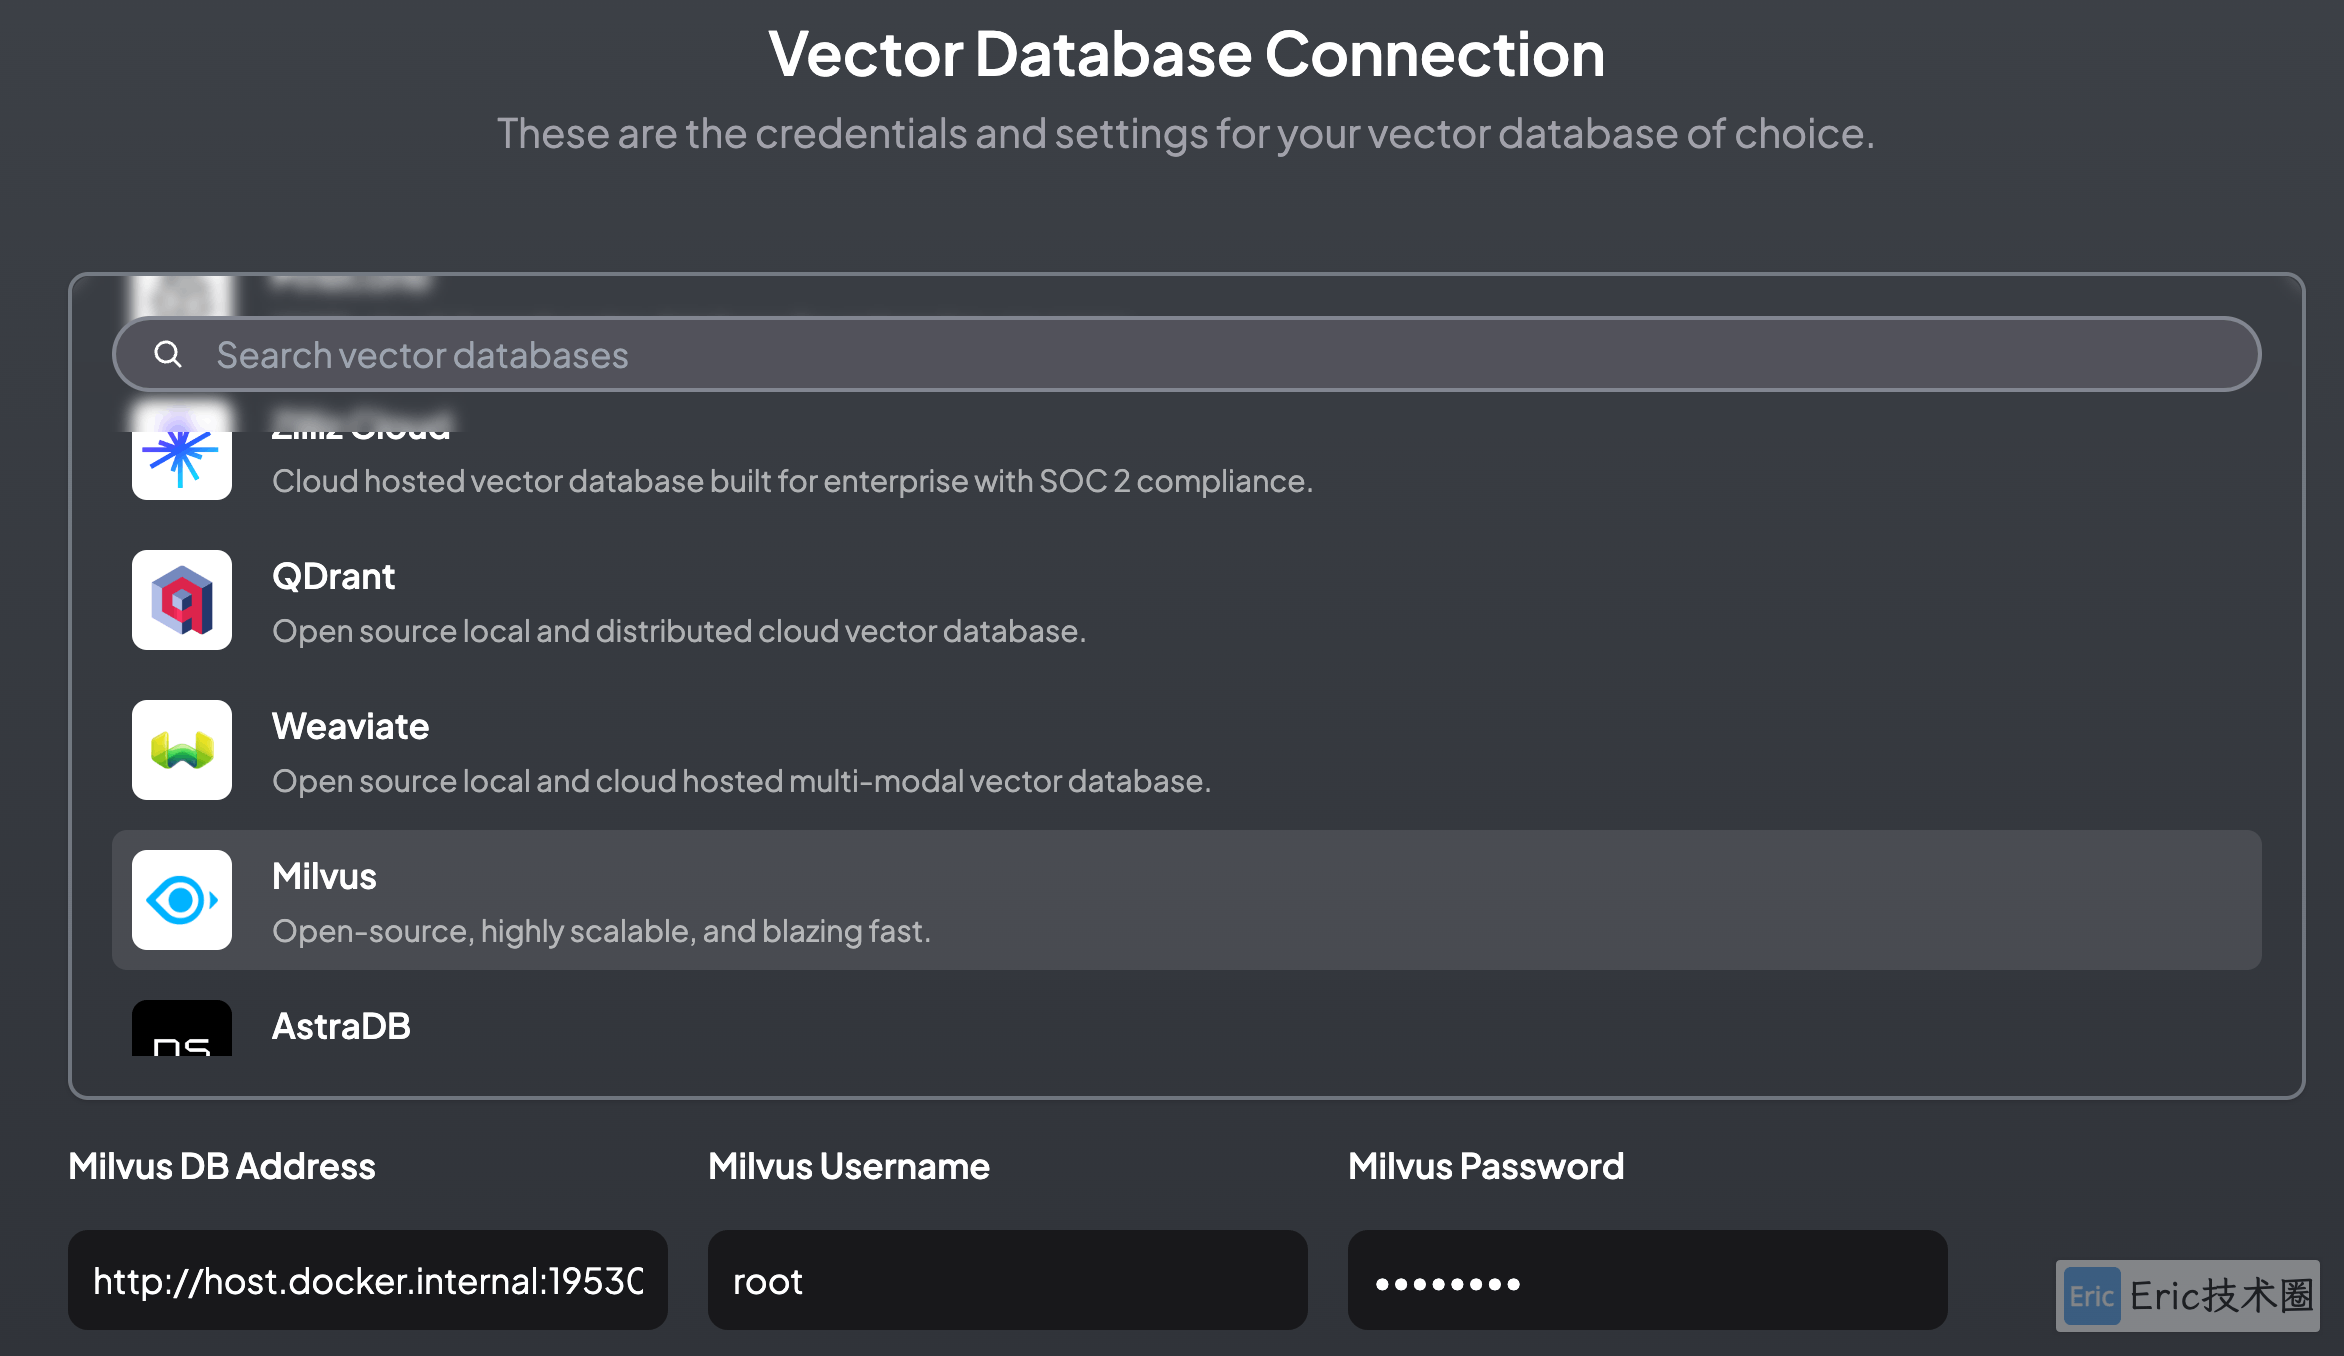
向量数据库配置
可以参看我之间的公众号文章:AI Agent 实战,或者 博文:https://flyeric.top/archives/setup-langchain-ai-agent-practice ,构建本地的Vector Database。也可注册Pinecone免费试用。
验证
这个问题回复字数太多:
>>> how do I build a RAG agent?
Building a RAG (Real-time Analytics Gathering) agent involves several steps that ensure it can collect, process, and analyze data in real-time. Here's an overview of the steps involved:
1. Define the problem statement: Determine what problem you want to solve using a RAG agent. This will help you identify the type of data you need to collect, how often you need to collect it, and any specific requirements for processing and analysis.
2. Choose a programming language: Decide on a programming language that you are comfortable with and that can handle the task at hand. Some popular choices include Python, Java, and C++.
3. Install necessary libraries and tools: Depending on your choice of programming language, you may need to install additional libraries or tools to collect data from various sources. For example, if you want to collect data from a database, you'll need to install a database driver for your chosen language.
4. Set up the RAG agent architecture: Determine how you want to structure your RAG agent, including the components that will handle data collection, processing, and analysis. This may involve using different programming languages or tools for each component.
5. Collect data from various sources: Depending on your problem statement, you may need to collect data from different sources such as sensors, logs, databases, APIs, etc. You'll need to use the appropriate libraries and tools to collect the data and store it in a format that can be processed by your RAG agent.
6. Process collected data: Once you have collected the data, you'll need to process it to extract meaningful insights or patterns. This may involve using machine learning algorithms, statistical models, or other techniques to analyze the data and generate reports.
7. Analyze data for insights: After processing the data, you'll need to analyze it to identify any trends, patterns, or anomalies that can help you make informed decisions. This may involve using visualization tools such as charts, graphs, or dashboards to present the results in a clear and concise manner.
8. Integrate with other systems: If your RAG agent needs to integrate with other systems, you'll need to set up communication protocols and APIs that allow it to exchange data with those systems. This may involve using messaging queues or event-driven architectures.
9. Test and validate the RAG agent: Before deploying your RAG agent in production, you'll need to test it thoroughly to ensure it works as expected. You may need to simulate different scenarios and test edge cases to ensure that your agent can handle unexpected data or errors gracefully.
10. Deploy and monitor the RAG agent: Once you have tested and validated your RAG agent, you'll need to deploy it in production and monitor it continuously to ensure it remains reliable and efficient. You may need to set up monitoring tools such as logging, performance metrics, or alerts to detect any issues or anomalies early on.
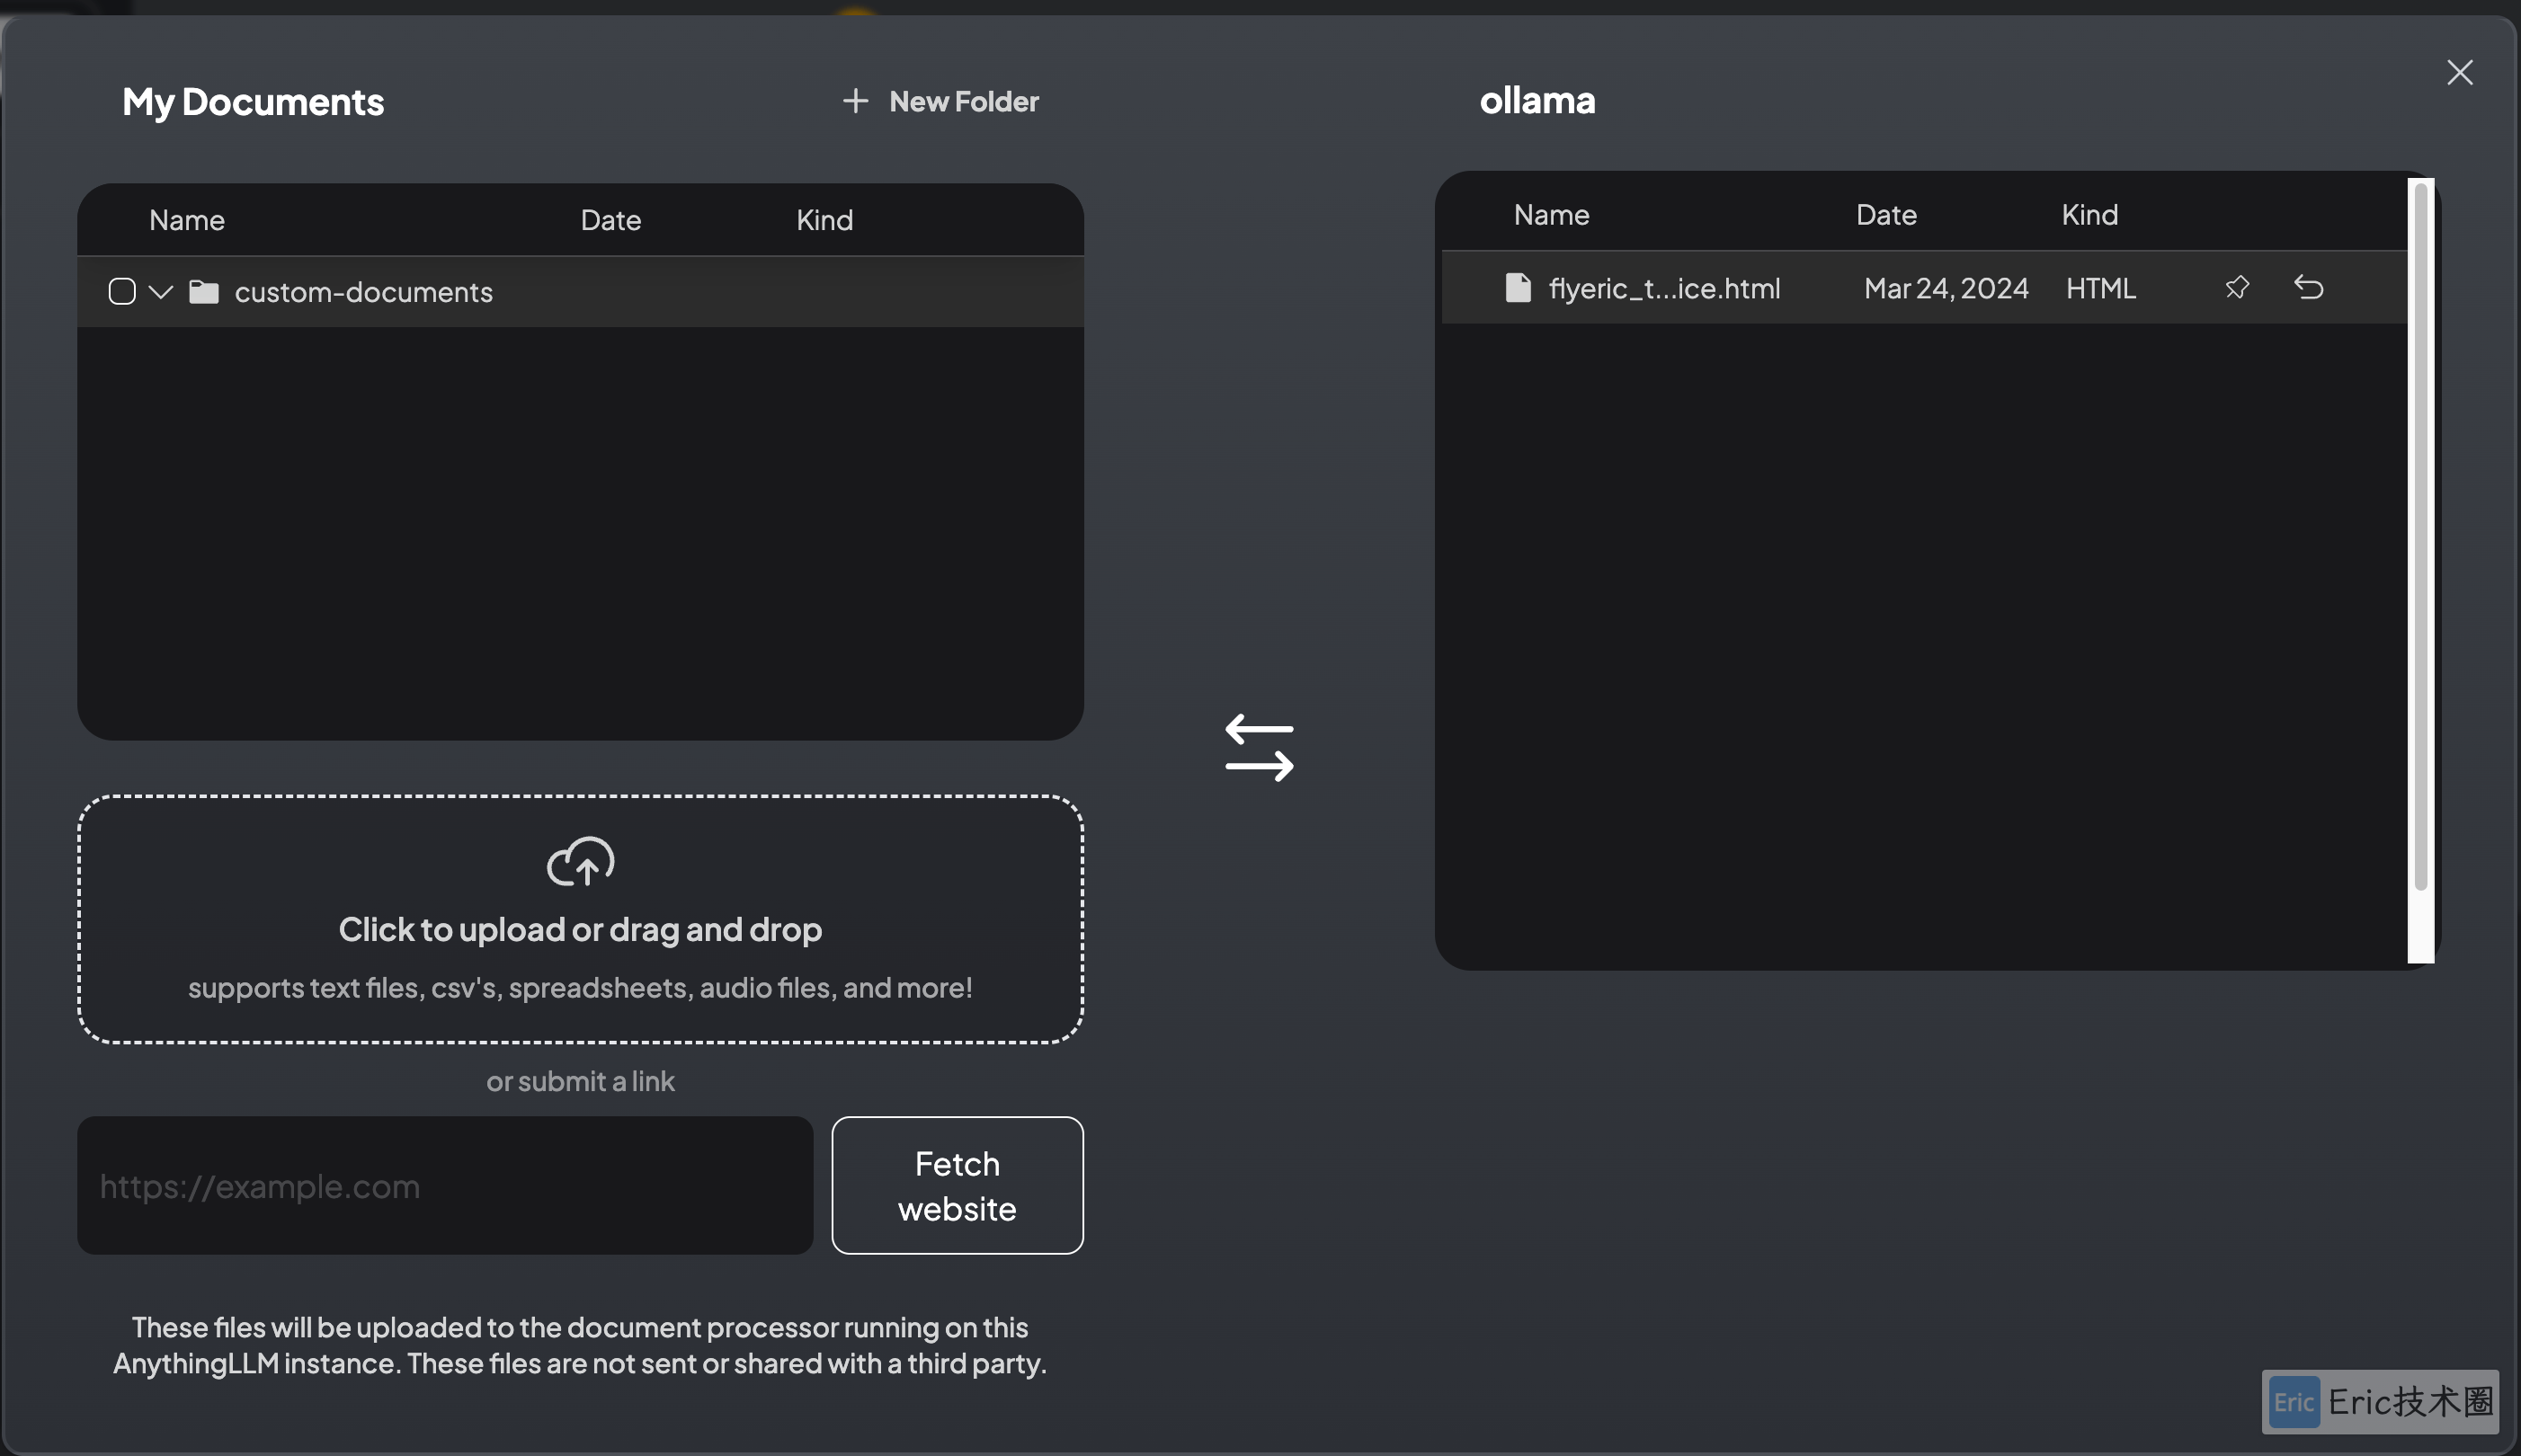
By following these steps, you can build a RAG agent that can collect, process, and analyze data in real-time, helping you make informed decisions based on the insights it generates.导入外部Documents
还可以通过UI界面导入website数据以及各种本地文件数据
总结
总体使用下来有惊喜,但是也有不少的问题:
本地运行大模型比较耗资源,只能选择较小的模型来作为基础模型
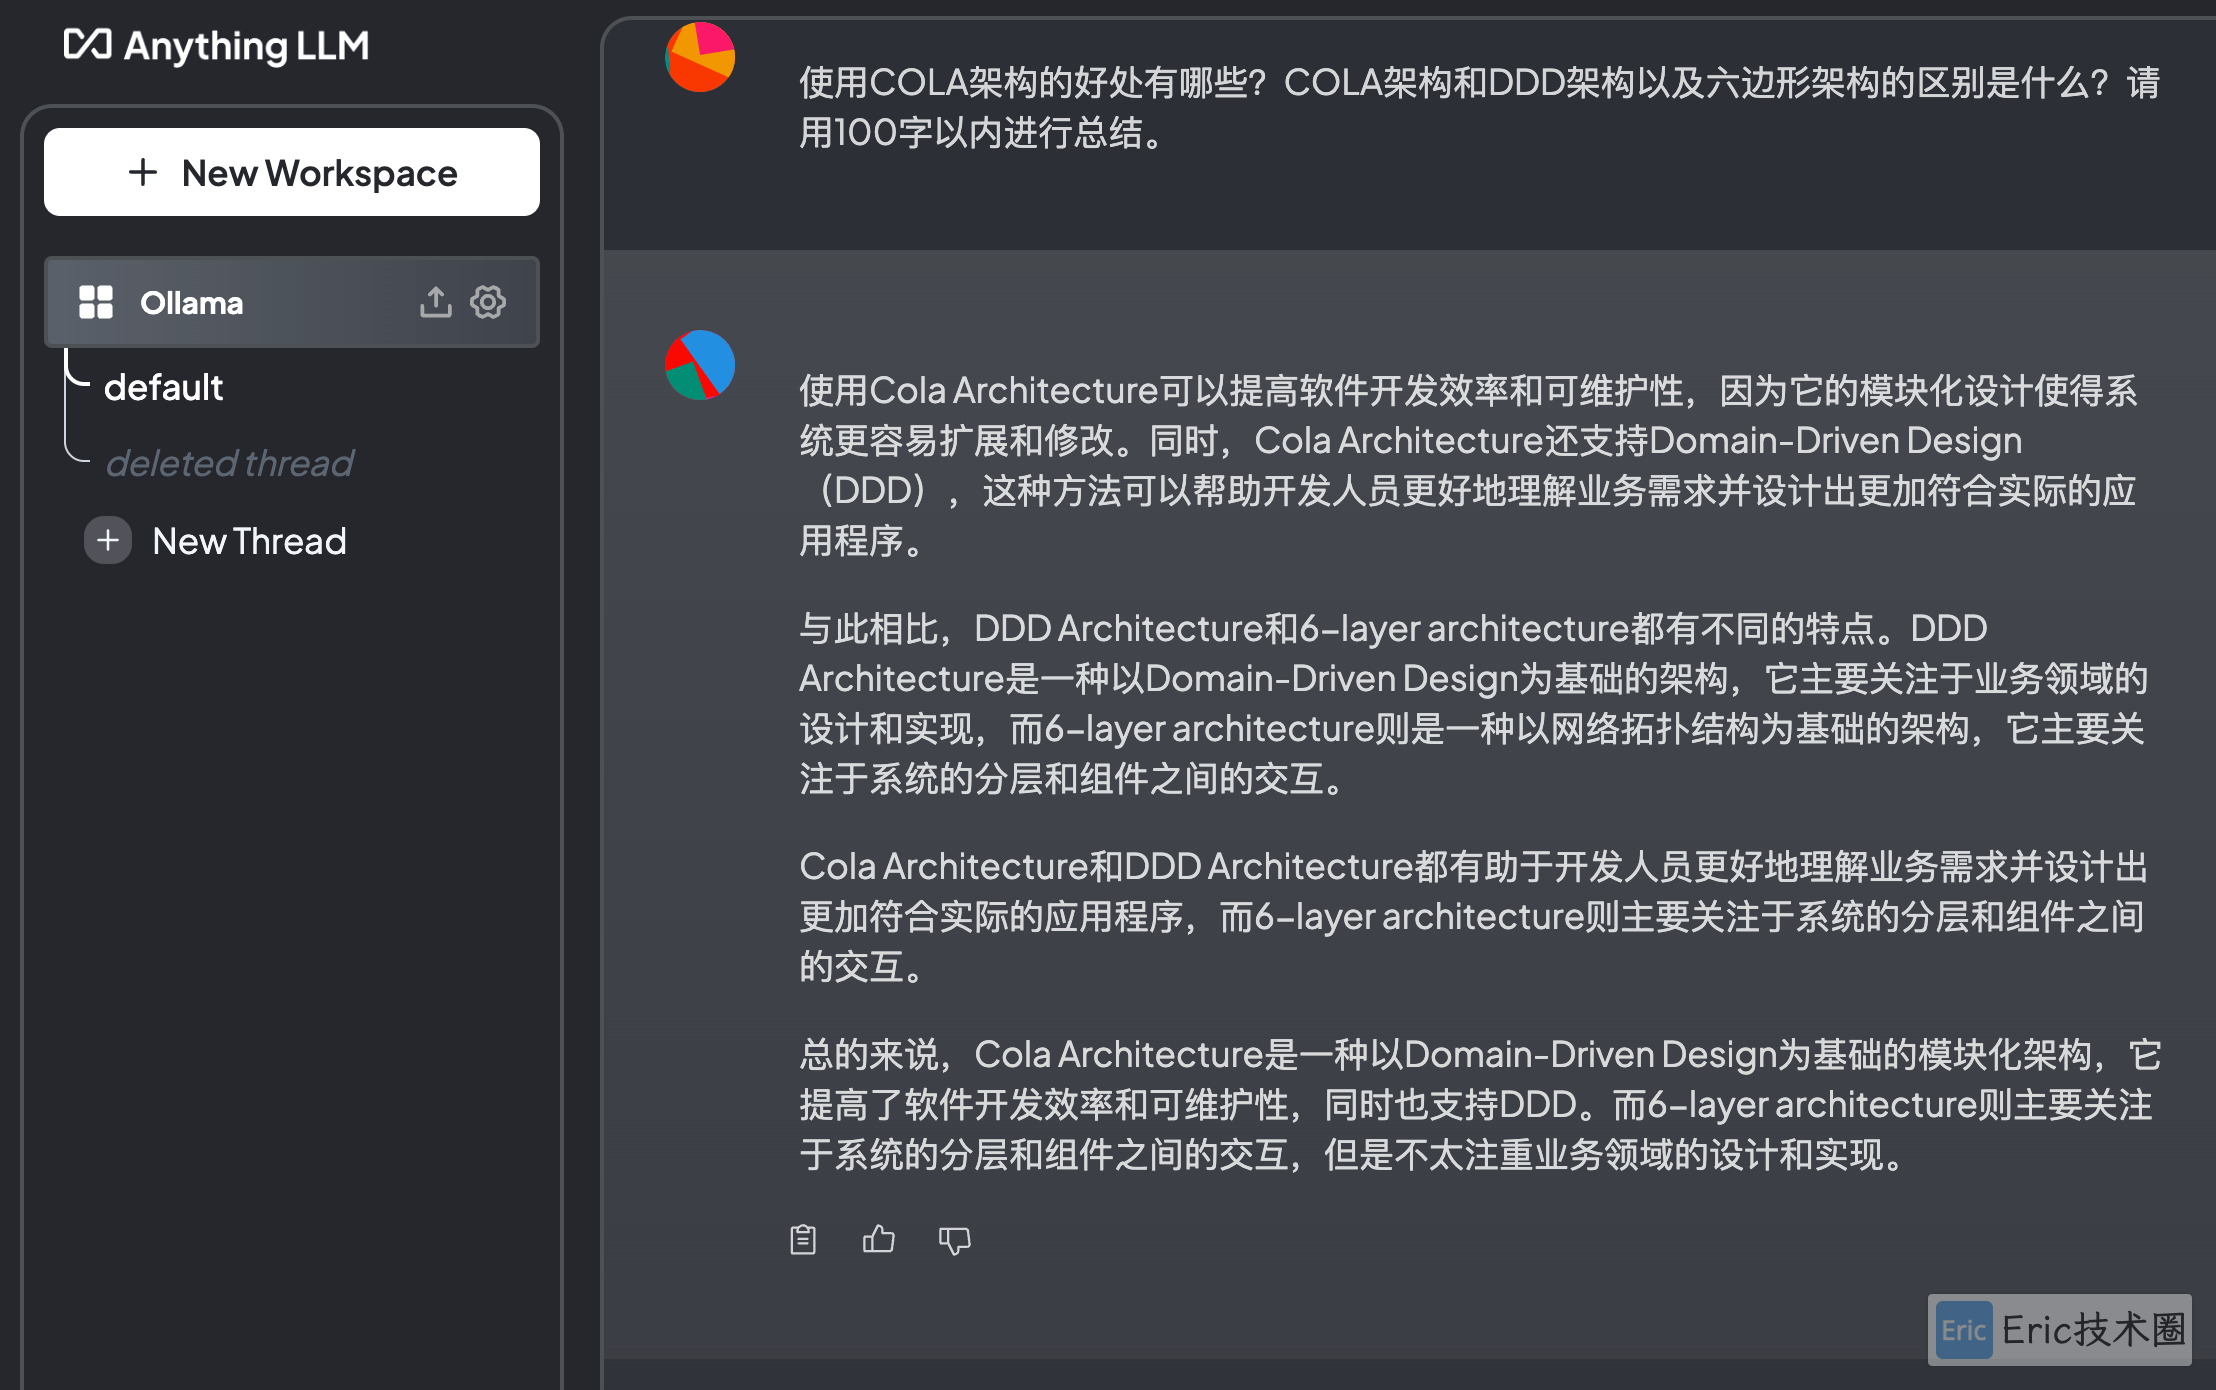
中文支持不大好
响应速度慢